15 Candle Holder Ideas That Look Expensive (Easy DIY & Decor)
A brass candlestick that looks beautiful at a thrift shop can feel strangely out of place on a crowded shelf. Sometimes it needs cleaning. More often, it needs a better neighbor: a low ceramic bowl, a second candlestick, or simply more room around it.
There are six small DIY projects here, followed by nine ways to style the holders you already own. Each one tells you what to use and how to get the arrangement right. The painted, paper-covered, and air-dry clay projects are for battery-operated LED candles. A decorative finish or an ordinary glass jar is not automatically safe for a burning candle.
Quick guide: choose your project
| Idea | Extra spend* | Hands-on time | Candle |
|---|---|---|---|
| 1. Refresh thrifted brass | $0–5 | 15–25 min · Easy | Verified holder or LED |
| 2. Matte-black metal makeover | $8–18 | 20–35 min · Easy | LED |
| 3. Color-block ceramic | $5–12 | 25–40 min · Easy | LED |
| 4. Pressed-flower jar | $6–18 | 25–45 min · Easy | LED |
| 5. Frosted-tissue jar | $3–10 | 20–35 min · Easy | LED |
| 6. Sculptural clay stand | $5–15 | 35–60 min · Moderate | LED |
| 7. Matching vintage pair | $0 if owned | 5–10 min · Easy | LED near artwork |
| 8. Three mismatched sticks | $0–10 | 10–15 min · Easy | Verified holders or LED |
| 9. Ribbed-glass cluster | Varies | 5–10 min · Easy | Rated votives or LED |
| 10. Sculptural silver accent | $0 if owned | 5–10 min · Easy | Verified holder or LED |
| 11. Tonal neutral grouping | $0–10 | 10–15 min · Easy | LED for craft pieces |
| 12. Coffee-table tray | $0–15 | 10–15 min · Easy | LED |
| 13. Asymmetrical mantel | $0 if owned | 10–20 min · Easy | LED near artwork |
| 14. Seasonal centerpiece | $0–10 | 10–20 min · Easy | LED with foliage |
| 15. Entryway lantern | $0–15 | 5–10 min · Easy | LED |
*Rough planning allowances in US dollars for extra supplies, assuming you already have the main holder or jar and basic tools. These are estimates, not store prices. Buying new holders can cost more. Times are hands-on estimates; paint curing and clay drying are additional. A “verified holder” means a stable, manufacturer-approved holder made for the candle you plan to burn.
Six easy DIY candle holder ideas
1. Refresh thrifted brass candlesticks
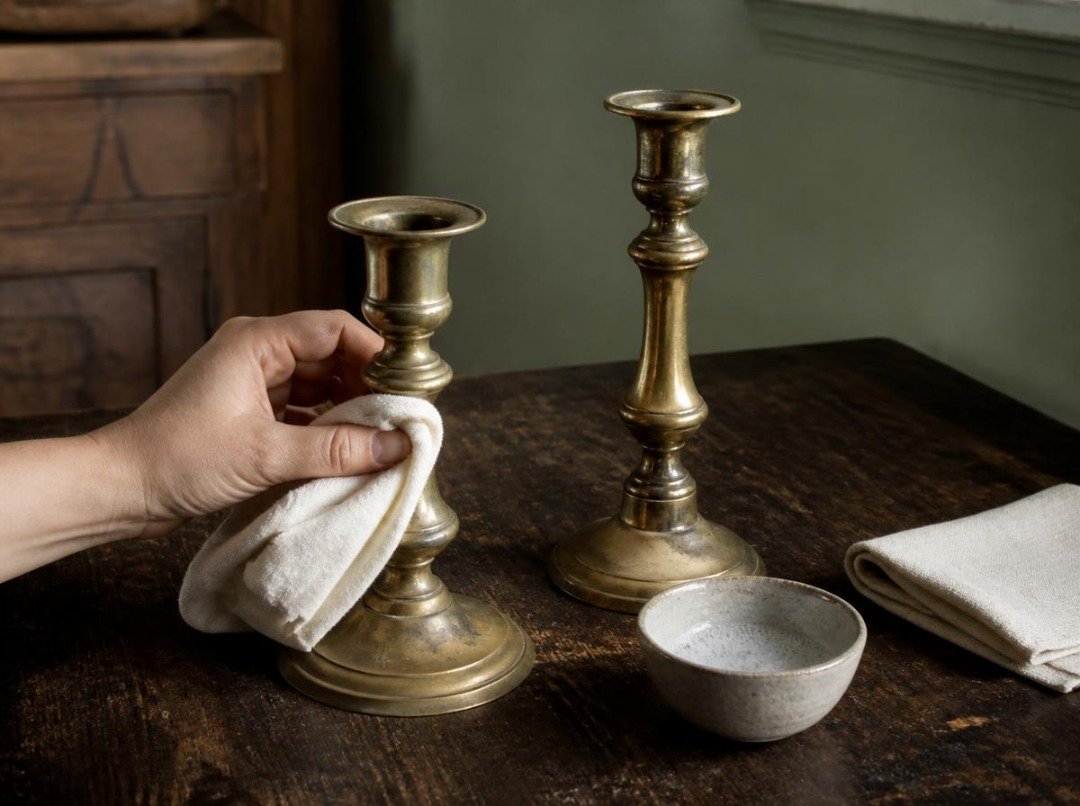
Before you reach for brass polish, check what you have. A slightly darkened finish can look lovely against linen and warm wood, and polishing a plated or lacquered piece may damage it.
Start with a soft cloth, a little mild dish soap, water, and a dry towel. Inspect the base and candle socket first. If the holder rocks, has a cracked joint, or no longer grips its candle, keep it as decoration rather than lighting it.
- Allow any old wax to cool fully, then gently lift away what comes off easily. Avoid prying at the finish with a metal blade.
- Test a lightly dampened cloth on an inconspicuous area. Wipe away dust and greasy marks without soaking the holder.
- Dry every joint and crevice immediately. If the finish is plated, lacquered, or antique, leave aggressive polishes alone unless you know the appropriate care method.
- Set the cleaned candlestick beside a low bowl or vase. If using three, choose different heights and stagger their positions instead of lining them up.
For a real taper, use only an intact, stable holder designed for that candle, with the candle securely fitted. If you are unsure about the piece, an LED taper is the sensible choice. Other finds worth saving appear in our upcycled home decor ideas.
2. Paint a matte-black metal holder
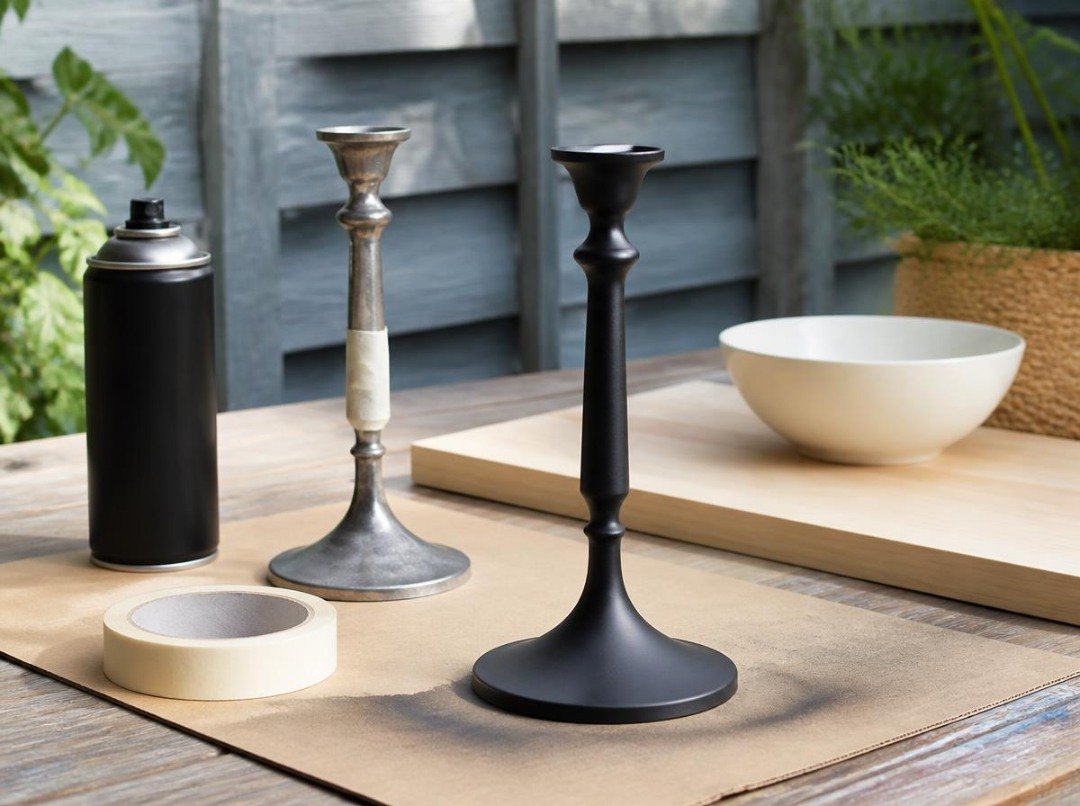
Black paint can make a fussy metal candlestick feel quieter and more modern. Choose a holder with sound joints and a clean surface. This is a decorative LED project; ordinary spray paint is not a heat-safe candle finish.
- Remove dust, wax, and grease with a suitable cleaner, then let the metal dry completely. Do not sand or disturb an unknown old coating; older painted objects may need specialist handling.
- Check the paint label for compatible surfaces and whether a primer is required. Protect the surrounding area and mask parts you want to leave unpainted.
- Spray outdoors or in the ventilation conditions the manufacturer specifies. Keep the can moving and apply light, even coats rather than trying to cover everything at once.
- Allow the stated interval between coats. Leave the finished piece to dry and cure for the full period on the specific product label before bringing it inside.
- Set it against something pale, such as an oak shelf or cream wall, and add an LED taper.
If the finish has runs, don’t add another heavy layer to hide them. Let the paint dry and follow its instructions for correcting the surface. Rust-Oleum’s metal spray guidance explains surface preparation and thin-coat application; drying times vary by product.
3. Make a color-blocked ceramic accent
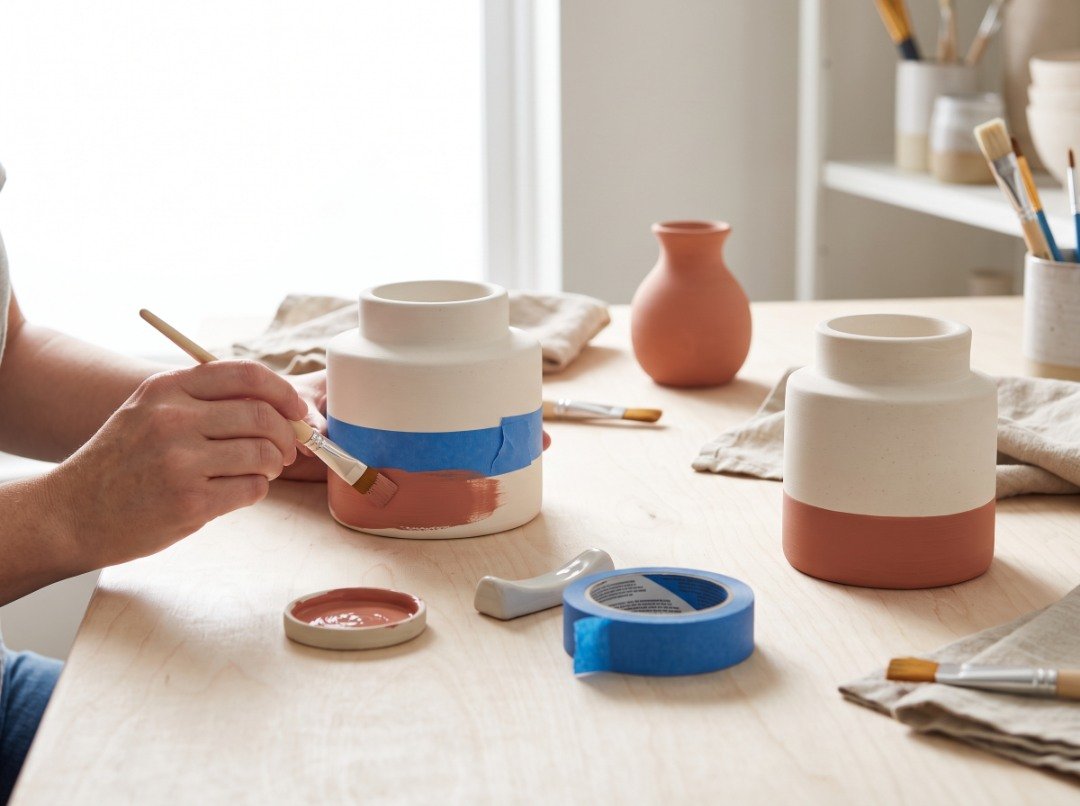
A plain ceramic piece is a good place to use one strong color. Try a cream holder with a terracotta band around the bottom third. It works nicely near a vase in the same shade without turning the whole shelf into a matching set.
- Choose a ceramic decorative holder or blank and check the craft paint label. Paint intended for porous ceramics may not adhere well to a glossy glazed surface without special preparation.
- Clean away dust, then let the piece dry. Put painter’s tape around the section you want to color. Work slowly where the surface curves so the tape lies as flat as possible.
- Paint in thin layers with a small brush. Build coverage gradually, following the instructions for re-coating and removing the tape.
- Allow the finish to cure completely. If a little paint has crept under the tape, neaten the edge with a fine brush instead of painting another wide band.
- Use an LED candle and repeat the painted shade once elsewhere in the room, perhaps in a cushion or vase.
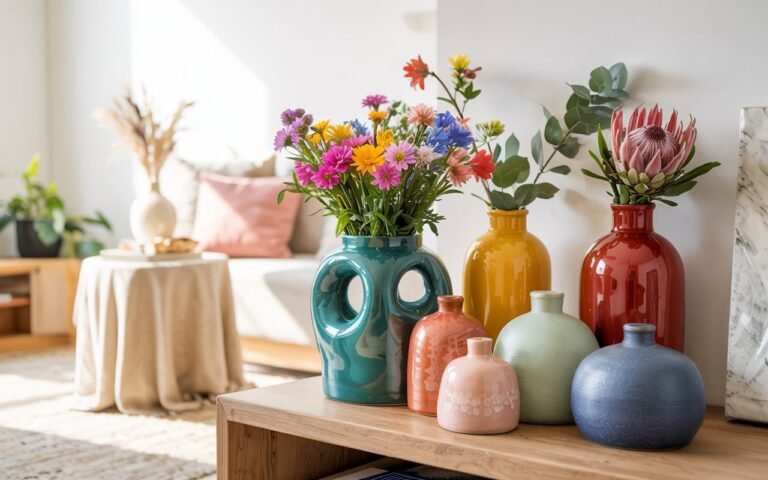
A painted surface is not automatically suitable for an open flame. Our colorful ceramic vase ideas offer more combinations if you prefer a bolder palette.
4. Decorate a pressed-flower jar lantern
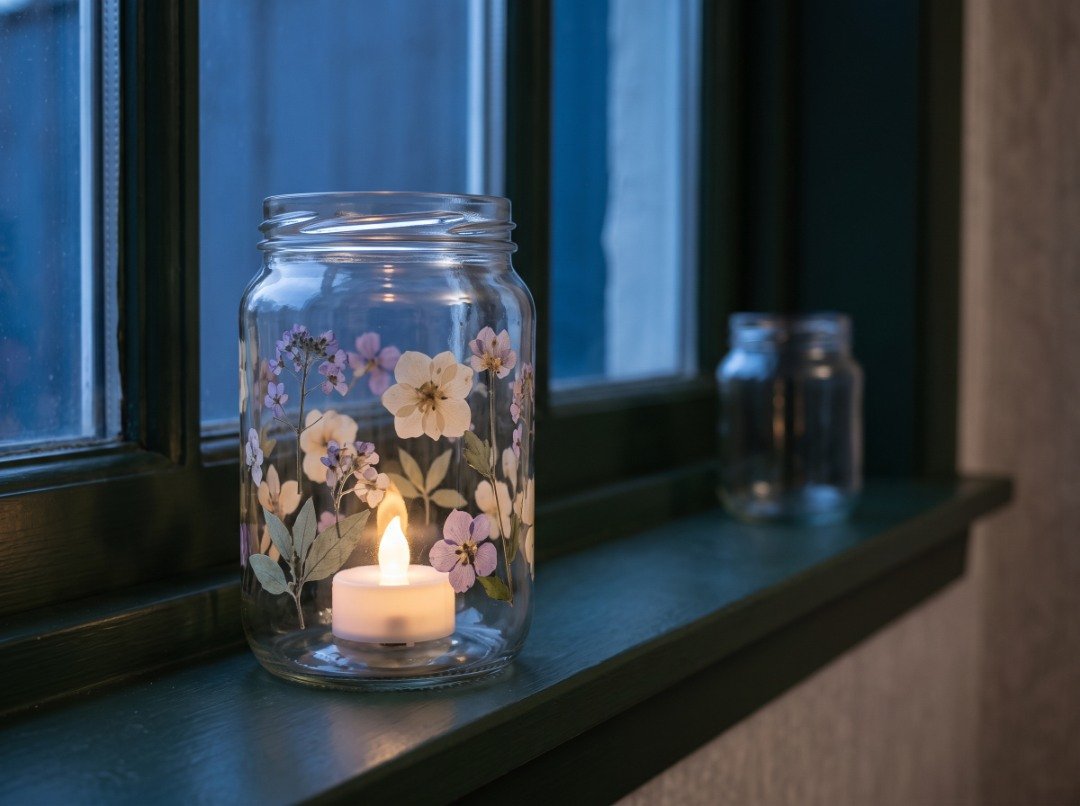
For this lantern, a few pressed flowers are more effective than covering the entire jar. Leave clear glass between the petals so the small LED light can shine through.
Gather a clean, empty glass jar, fully dried pressed flowers or fern leaves, a brush, a decoupage medium suitable for glass, and a battery-operated LED tealight. Fresh flowers hold moisture and are harder to attach neatly.
- Remove the label and sticky residue from the jar. Wash it, dry it thoroughly, and follow the medium manufacturer’s surface-preparation instructions.
- Lay the flowers around the jar before applying glue. Try one small cluster near the base and another higher on the opposite side.
- Brush a thin layer of medium onto a small area outside the glass. Place a flower carefully, pressing from the center toward the edges with the soft brush.
- Work around the jar in short sections so petals do not slide. Apply a protective topcoat only if the product instructions call for one.
- Leave the finish to dry and cure as directed. Put the LED light inside once everything is completely dry.
Wet petals tear easily, so resist moving them repeatedly after they’re in place. Never light a real tealight in this decorated jar. For other paper-and-glue projects, see our Mod Podge craft ideas. Plaid also publishes glass decoupage preparation advice.
5. Create a frosted-tissue lantern
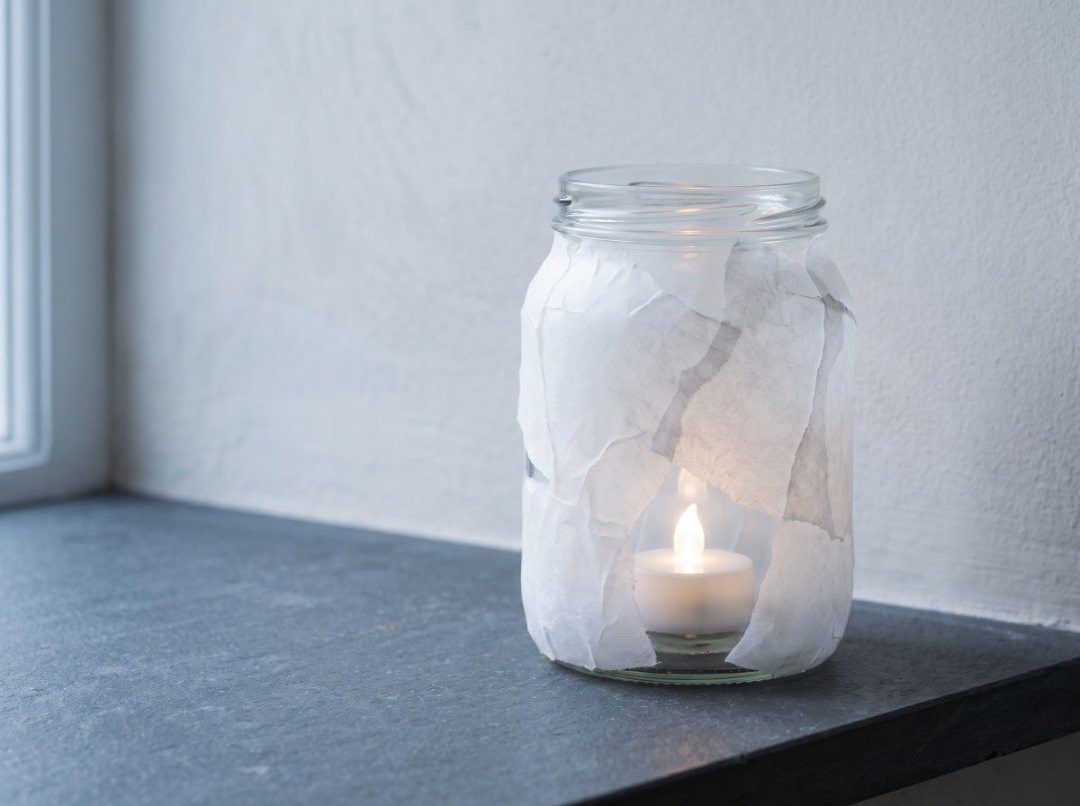
Tissue paper takes the shine off an ordinary jar and spreads the light more softly. Two loosely overlapping layers usually look more like frosted glass than a thick patchwork of paper.
- Find a smooth, clean jar and remove the label. Dry the outside completely.
- Tear white or warm-ivory tissue into small pieces with irregular edges. Cut out any thick seams or printed parts that would show up as dark patches.
- Work on a protected surface. Brush a thin layer of glass-compatible decoupage medium onto one section of the jar, place a tissue piece on top, and smooth it gently with the brush.
- Overlap pieces slightly until the outside is covered. Leave a few thinner sections where you want more light. Keep adhesive and tissue out of the inside of the jar.
- Allow the medium to dry and cure according to its label. Place a battery-operated LED tealight inside, with its switch still easy to reach.
If the paper wrinkles, stop brushing it while wet; extra handling can turn a small crease into a tear. This is a flameless lantern only. Tissue and decoupage medium can burn, and an ordinary jar is not a candle-rated container.
6. Shape a sculptural clay-look stand
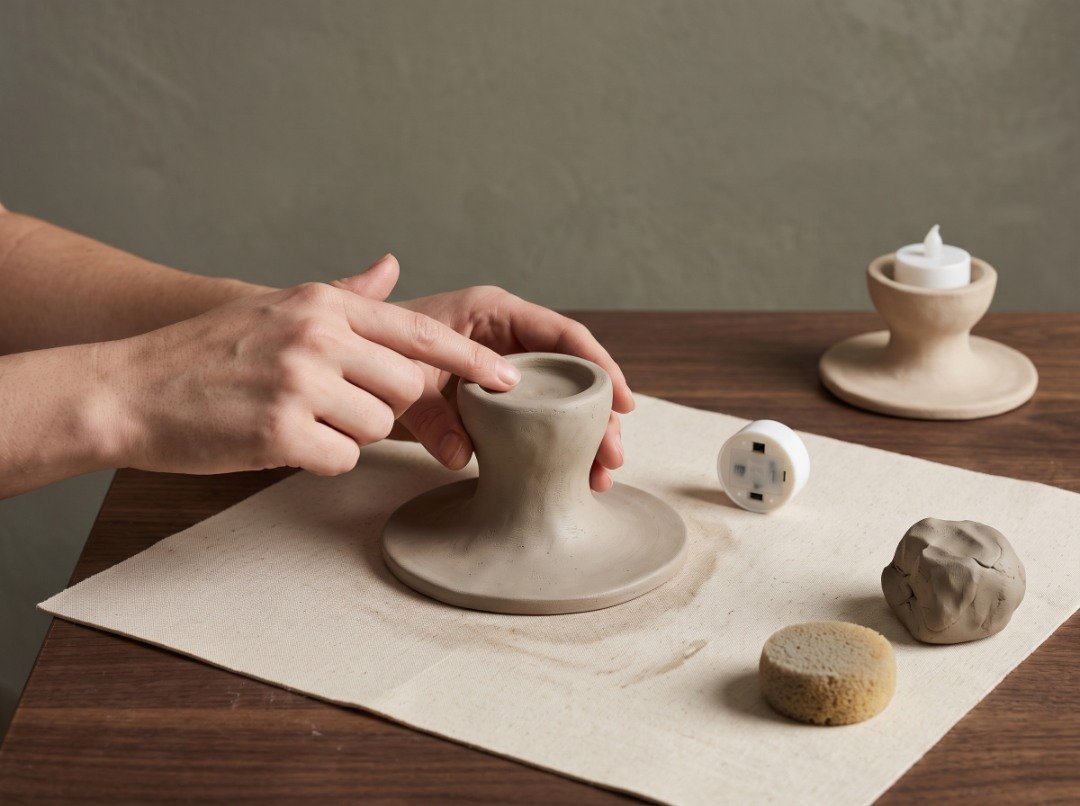
Air-dry clay is easiest to work with when the shape is broad and simple. A low ring or stack of two thick disks is less likely to topple than a tall, narrow column. It should hold a removable LED light, never a burning candle.
- Place a work mat on a flat table. Check the clay packet for the recommended thickness and drying method before shaping.
- Form a low base wider than the LED tealight. Press the bottom gently against the mat so it sits flat.
- Make a shallow recess in the center. Test the fit with the unlit LED light, then remove the light before the clay dries. Leave access to its switch and battery compartment.
- Smooth cracks with the method recommended for your clay. Avoid an overly thick center, which may dry unevenly or crack.
- Leave the piece undisturbed for the full drying period on the packaging. Paint it only when dry, if the manufacturer permits, and wait for the paint to cure.
- Return the LED light, check that the stand does not wobble, and place it on a level shelf.
If the base curls upward as it dries, do not try to compensate with a candle inside it. Make a lower, flatter version instead. Air-dry clay is not kiln-fired ceramic and should never be assumed heat-resistant.
Nine candle holder decor ideas for any room
7. Frame artwork with two vintage holders
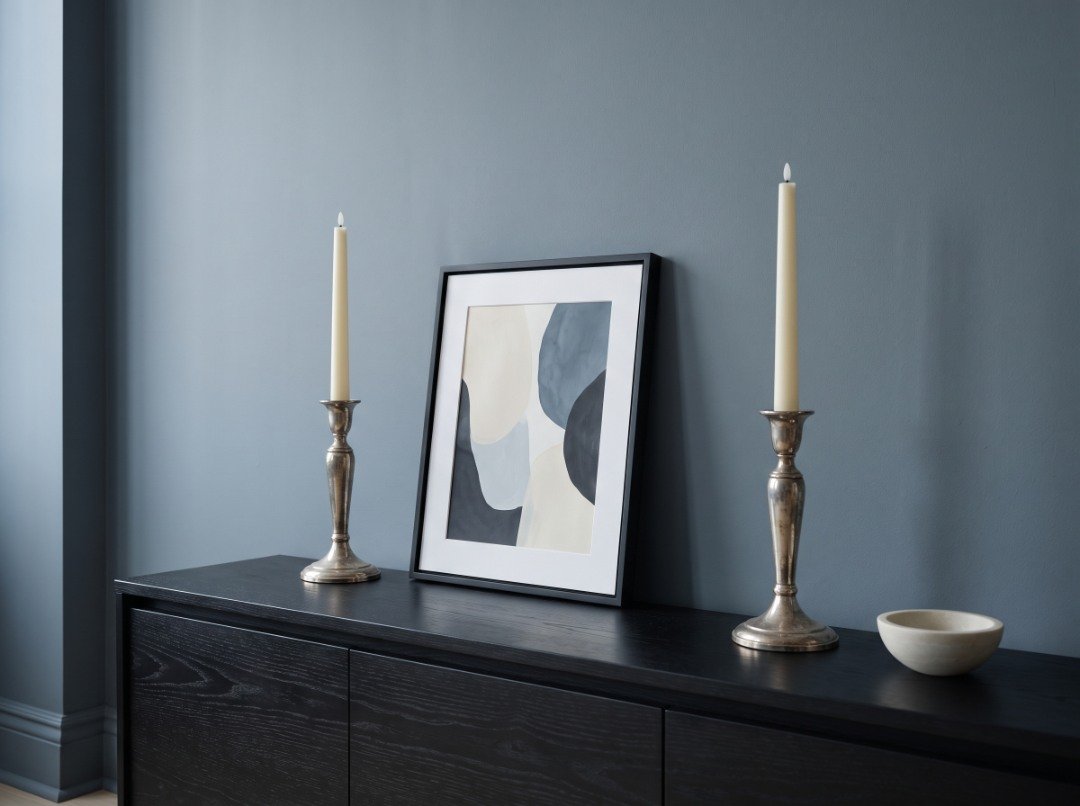
A matching pair looks strongest when it has something to frame. On a sideboard, place the candlesticks just beyond the edges of a small painting or mirror. Move them outward a little if the arrangement feels cramped; there is no need to press everything together.
Keep the heights similar, then let the object in the middle break the symmetry. A low vase is useful here because it leaves the artwork visible. If the two holders have different finishes, repeat their shared candle color instead of painting them to match.
Use LED tapers when the setup includes framed prints, wooden frames or other materials that could catch fire. A real candle needs the clearance specified for open flames, which many display shelves cannot provide.
8. Mix three mismatched candlesticks
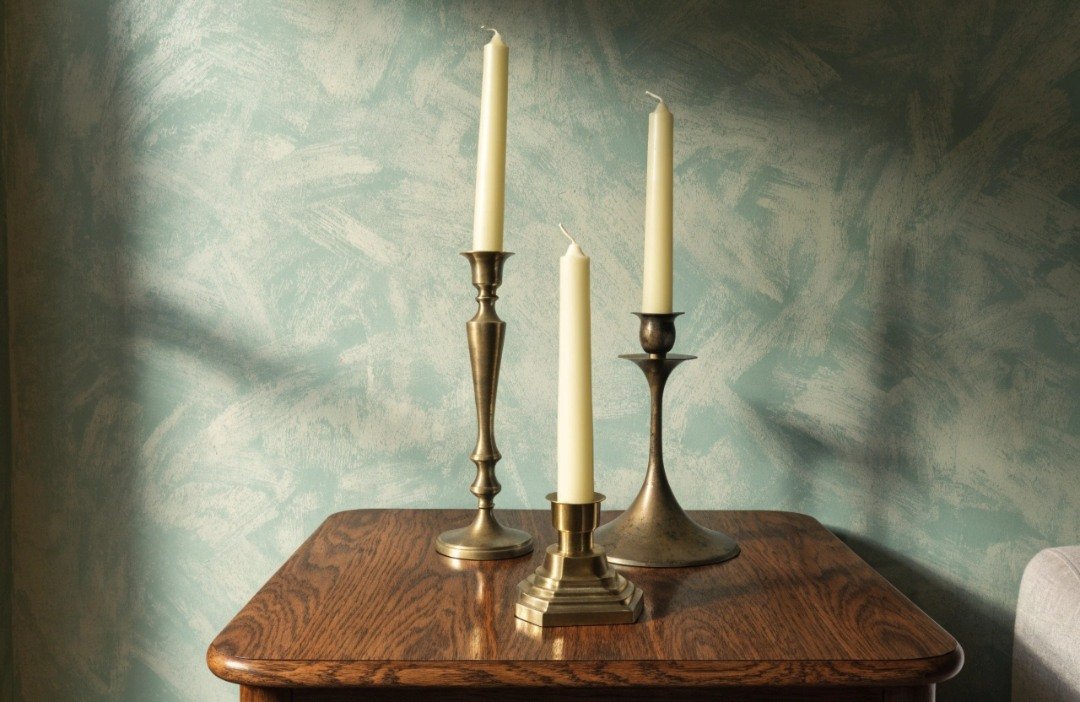
Three vintage candlesticks rarely match perfectly, and that is part of their appeal. Look for one detail that connects them: a warm brass tone, a similar base shape, or ivory candles in all three. The holders can be quite different in height.
Put the tallest one slightly behind the others and move the shortest forward. Then shift the third holder sideways until you can see each outline. If the grouping resembles three fence posts, the pieces are probably too evenly spaced. Make a loose triangle instead.
A simple ceramic bowl beside the group is enough. Skip the extra trinkets. Use real tapers only in stable holders designed to take them, with proper clearance; otherwise choose LEDs. Our vintage eclectic decor guide has more ideas for mixing objects collected at different times.
9. Group ribbed-glass votives
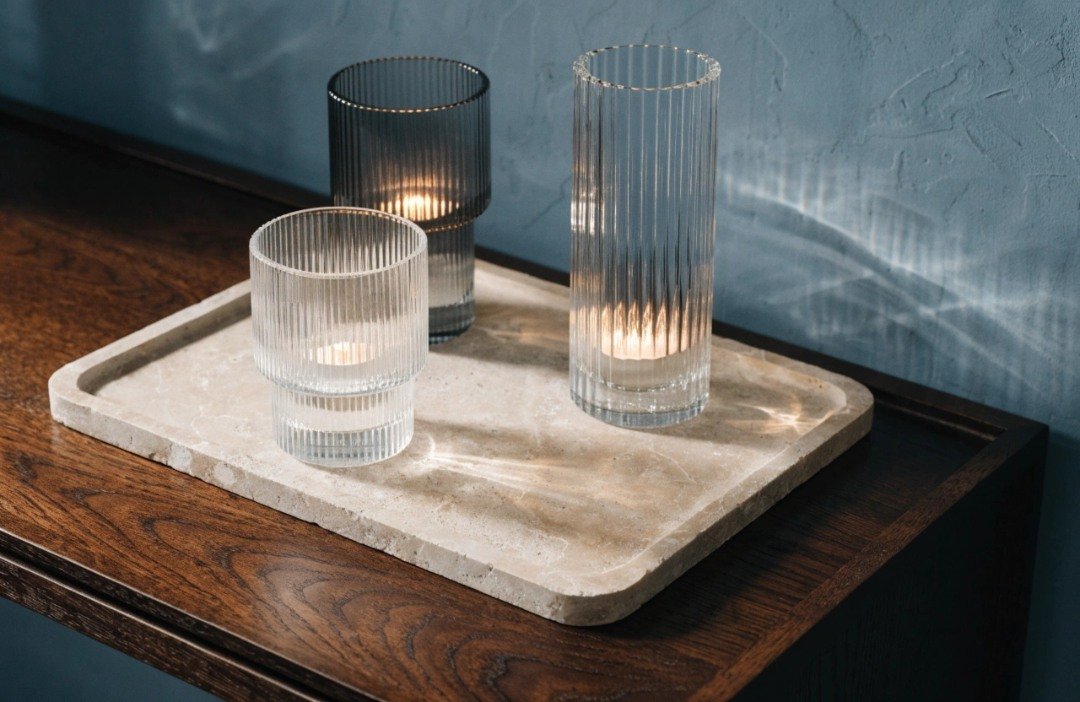
Ribbed glass is useful when a room already contains heavy wood or dark metal. Light passes through the ridges, so the grouping has texture without needing much color. Start with two clear votive holders and one smoky-gray one, preferably in two different heights.
Set them on a plain stone or ceramic tray with a little space between each piece. From the side, you should still see the edge of the tray. If the holders seem to disappear against a pale table, add one darker votive instead of adding more objects.
Only votive glass manufactured for actual candles should be used with flame, and you must follow its directions. Decorative drinking glasses and thrifted jars belong in the LED version of this arrangement.
10. Let sculptural silver stand alone
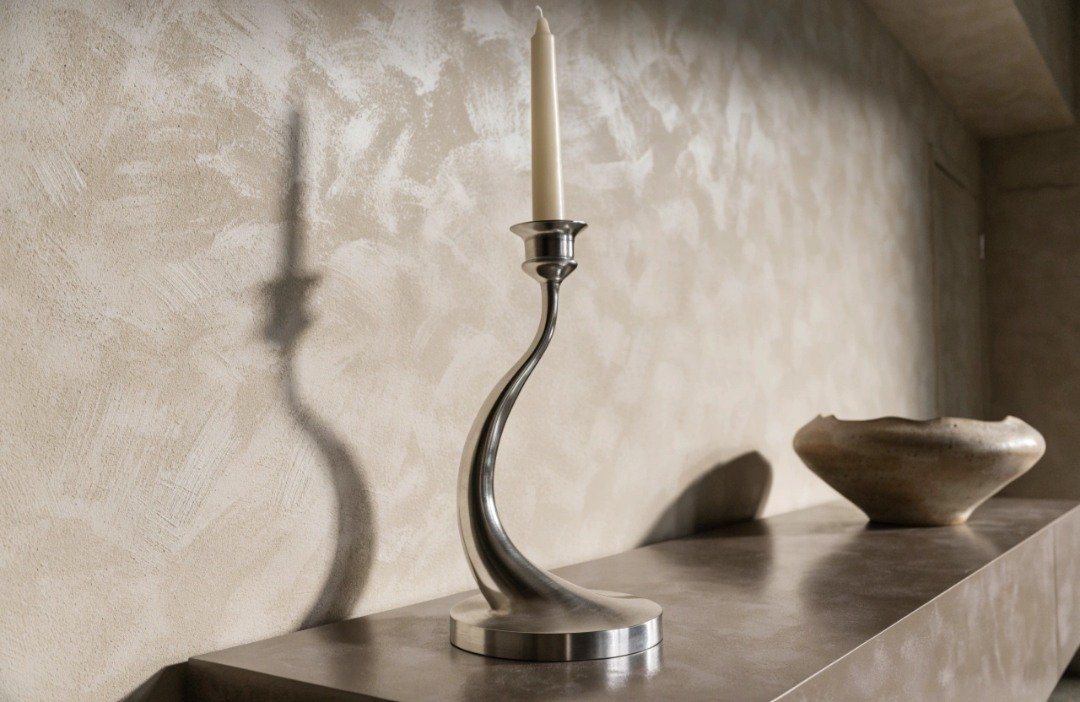
A curved or sharply angled silver candlestick already has plenty going on. Put it on a sideboard where the shape can be seen clearly, rather than squeezing it between a row of vases. One low ceramic bowl to the side gives it some balance.
Silver can look stark against a cold gray wall. Try a warmer background, such as mushroom, oatmeal or light taupe. If you want another metallic object in the room, repeat the silver farther away instead of placing it immediately beside the holder.
A stack of art books can make a useful visual base for an LED display. Never position a real flame beside books or paper. For an actual lit candle, confirm that the holder is designed for it and keep a clear, heat-safe area around it.
11. Build a tonal neutral palette
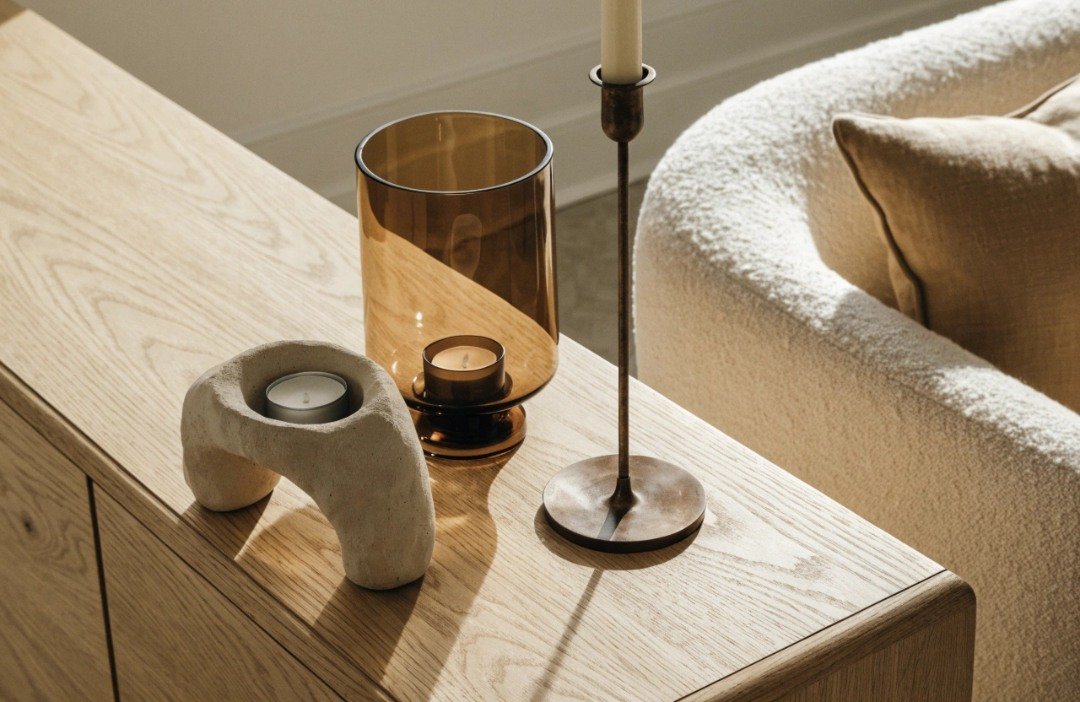
Pick a color family before gathering the holders. Cream, sand and chestnut work well on a pale wood shelf. So do muted terracotta, rusty brown and soft pink. The pieces can have different shapes as long as one or two colors keep appearing.
Try this on the shelf before buying anything: set a cream ceramic LED holder beside a brown metal candlestick and a clear glass piece. Add matching cream LED candles to the two taller holders. Take away anything that introduces an unrelated bright color. The grouping should read as one arrangement from across the room.
For a bolder option, keep all three holders the same color and vary the LED candles. The result is easier to adjust later because you have not painted the furniture or changed the whole room.
12. Make a coffee-table candle tray
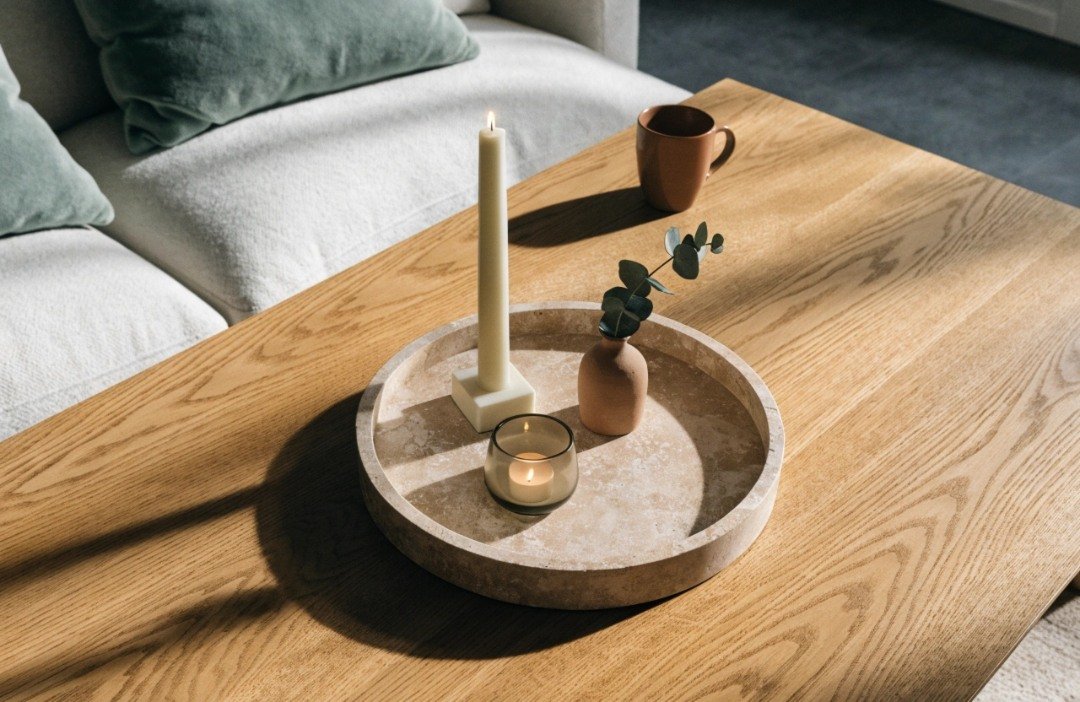
A tray keeps a coffee-table display contained, but it should not take over the surface. On a rectangular table, try a round tray with one LED pillar, a smaller flameless votive and a short vase. Leave a visible strip of tray around the objects so they do not look crowded.
Put the tallest piece toward the back and keep the shorter items nearest the sofa. Sit down and check that the arrangement does not block conversation or the television. If you use the table every day, leave room for a cup and the remote.
Wooden trays, books, woven coasters and dried stems do not mix with open flames. Use a battery-powered LED pillar here. One with a timer avoids having to reach into the display every evening.
13. Style an asymmetrical mantel
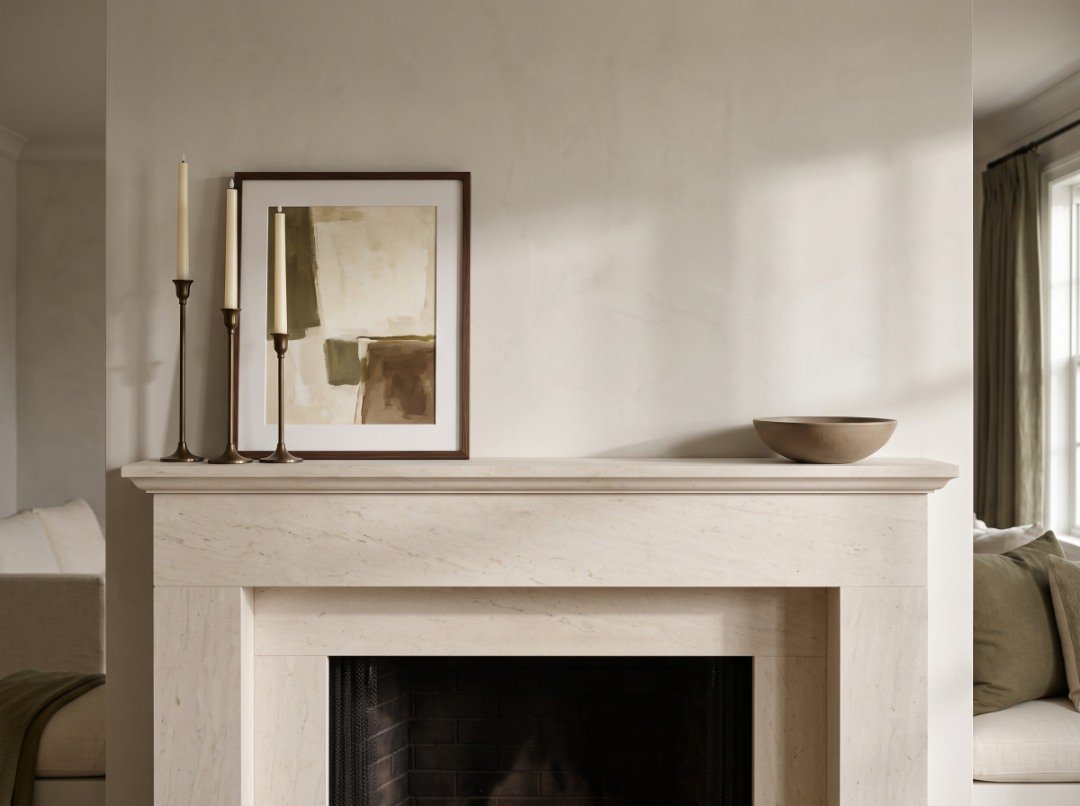
For a mantel, avoid scattering small candleholders evenly from one end to the other. Group two or three on one side instead. Place the tallest at the outside edge of that group and step down toward the center. A low vase on the opposite side can balance the display without copying it.
Stand back and look at the silhouette. Does each holder show, or is the middle one hidden? Move the bases a little rather than introducing another ornament. If there is a framed picture behind them, let the picture remain the tallest element.
Choose LED tapers when the mantel is dressed with artwork, dried flowers, garlands or other combustibles. Don’t set a burning candle under an overhanging shelf or near a frame.
14. Create a changeable seasonal centerpiece
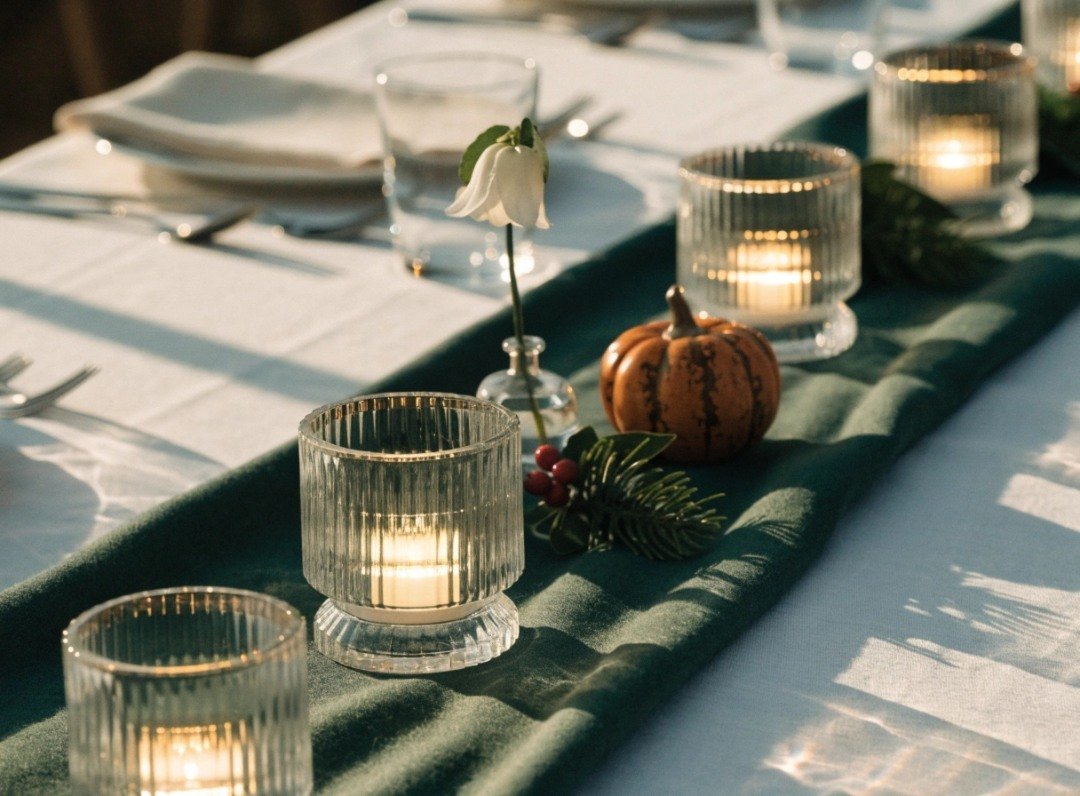
Keep the candleholders and change the accessories with the season. Three simple metal holders can stay on the table from spring to winter. Add small bud vases in spring, miniature ceramic pumpkins in fall, or a few faux greenery accents in December. Changing one detail is usually enough.
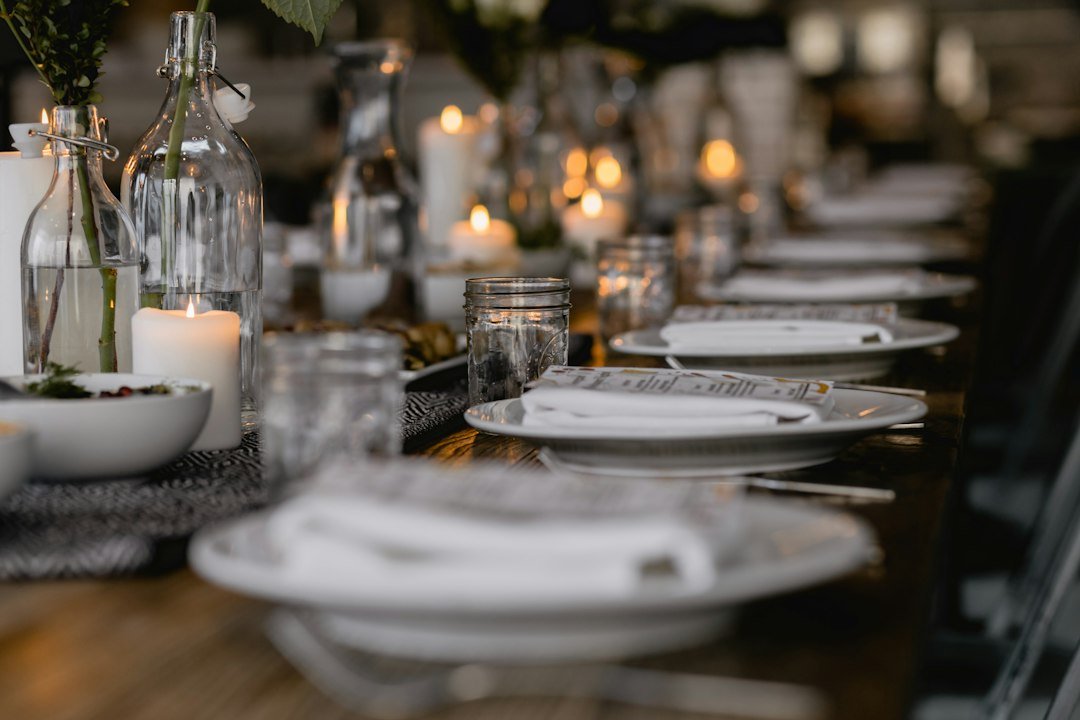
Before arranging anything, set the plates and serving dishes where they will actually go. Build the centerpiece in the space that remains. Keep the tallest item low enough that people can see across the table without leaning around it.
If you use a fabric runner, dried botanicals or faux foliage, use flameless candles. For another seasonal approach, see our Thanksgiving table decor ideas.
15. Welcome guests with an entryway lantern
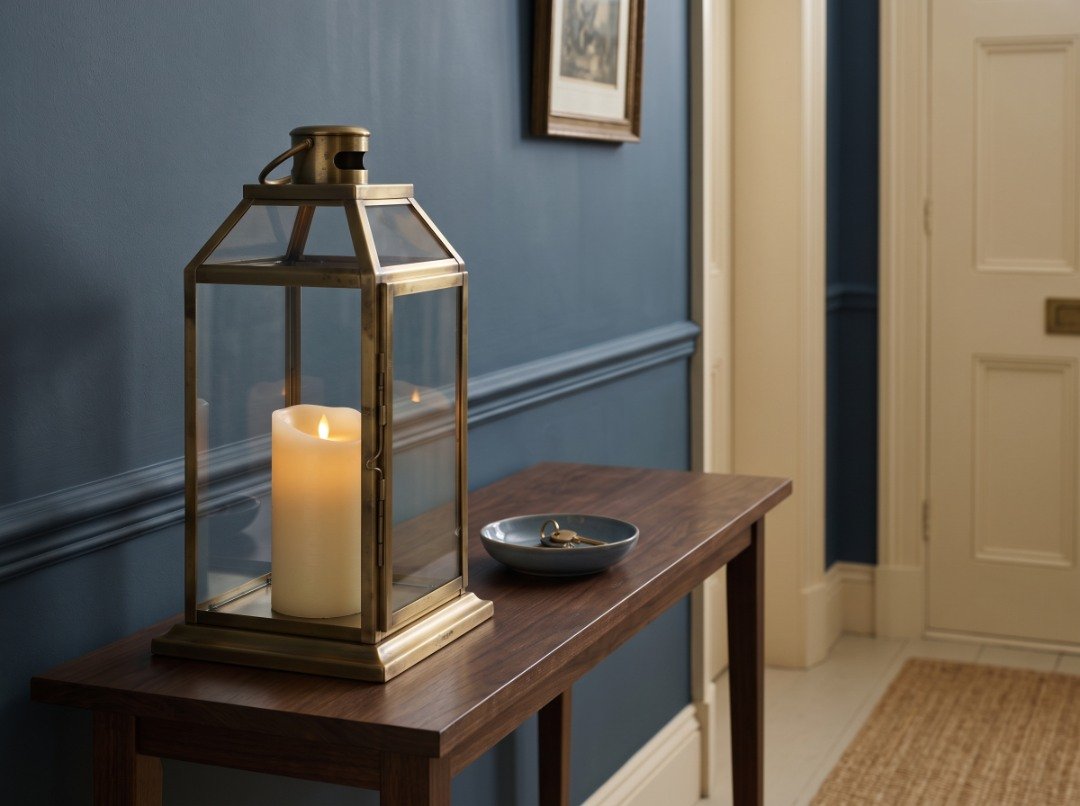
An entryway does not need a row of small lights. A single lantern with a warm LED pillar can fill the space beside a key bowl or a small vase. Pick a lantern with a stable base and a door that opens easily so you can reach the battery compartment.
Place it where coats, bags and swinging doors will not knock it over. On a narrow console, keep the lantern to one side and leave the middle clear for everyday use. A small runner beneath it is fine with an LED, but do not place a burning candle on fabric.
A battery-powered pillar with a timer is useful in this spot. It can come on in the early evening without leaving a live flame burning in an otherwise empty hallway.
Five things to check before you call the display finished
- Look at the heights from across the room. Three holders of the same height can read as one flat row. Move one away or try a taller, narrower piece.
- Choose a shared detail. Brass, black metal and colored glass can coexist, but too many competing finishes make it harder to see the grouping. Repeated candle colors help.
- Check the empty space. If every inch of a tray or shelf is covered, remove one accessory before adding another.
- Sit down at the dining table. A centerpiece that works in a photo may block the person opposite you. Check the actual sightline.
- Keep flammable decor clear of real flames. That includes books, fabric runners, dried stems, paper art and seasonal garlands. Use LEDs when these are part of the arrangement.
How to use real candles safely
For a burning candle, choose a sturdy nonflammable, heat-resistant holder specifically designed for that candle type, and keep the entire setup on a stable surface. According to the U.S. Fire Administration, keep lit candles at least 12 inches from anything that can burn. Never leave one unattended, and extinguish it before leaving a room or falling asleep. Keep candles away from pets, children, drafts and walkways.
The National Candle Association also recommends trimming the wick to approximately 1/4 inch and using appropriate holders. The association warns that everyday drinking glasses and decorative jars may not be able to withstand candle heat. Choose a flameless alternative for upcycled containers and handcrafted stands.
Questions people ask about candle holder decor
How can I make cheap candle holders look more expensive?
Start with the arrangement. Pair one tall holder with a shorter piece, match the candle colors, and remove the objects competing for attention. If a thrifted holder has a good shape and a worn brass finish, try cleaning it before painting it.
Will a real candle work in a painted candle holder?
Only if the complete product is approved for that candle and intended use. Painting an old holder with ordinary craft or spray paint does not make the finish safe for flame or heat. For the painted projects in this guide, use LED candles.
Can I put a tealight in a mason jar?
A reused mason jar is not automatically a candle-rated container. Decorative jars covered in paper or flowers should always hold flameless LED tealights. For a real candle, use a container specifically designed for candle burning.
How do you keep air-dry clay from cracking?
Work within the thickness limits on the clay package, avoid a heavy solid center, and let the piece dry as directed. If the base warps or cracks, remake it wider and lower instead of trying to force a candle into an uneven opening. Air-dry clay projects are for LEDs only.
How many candle holders should go on a coffee table?
One LED pillar and one smaller votive are often enough when you also need space for a drink or book. Three can work on a large tray. Check the arrangement while sitting on the sofa, then remove anything that blocks the view or crowds the table.
Start with one small change
Try moving the holders you already own before shopping for a new set. A tall brass piece may only need a low bowl beside it. Three mismatched finds can work together once their candle colors match. For a weekend craft, the pressed-flower LED lantern uses a jar you would otherwise recycle and needs no special tools beyond a brush.
Leave the arrangement in place for a day and look at it in morning light as well as in the evening. If you still notice clutter, take away one piece. That is often enough.