DIY Christmas Decor Ideas: 4 Beautiful Handmade Projects
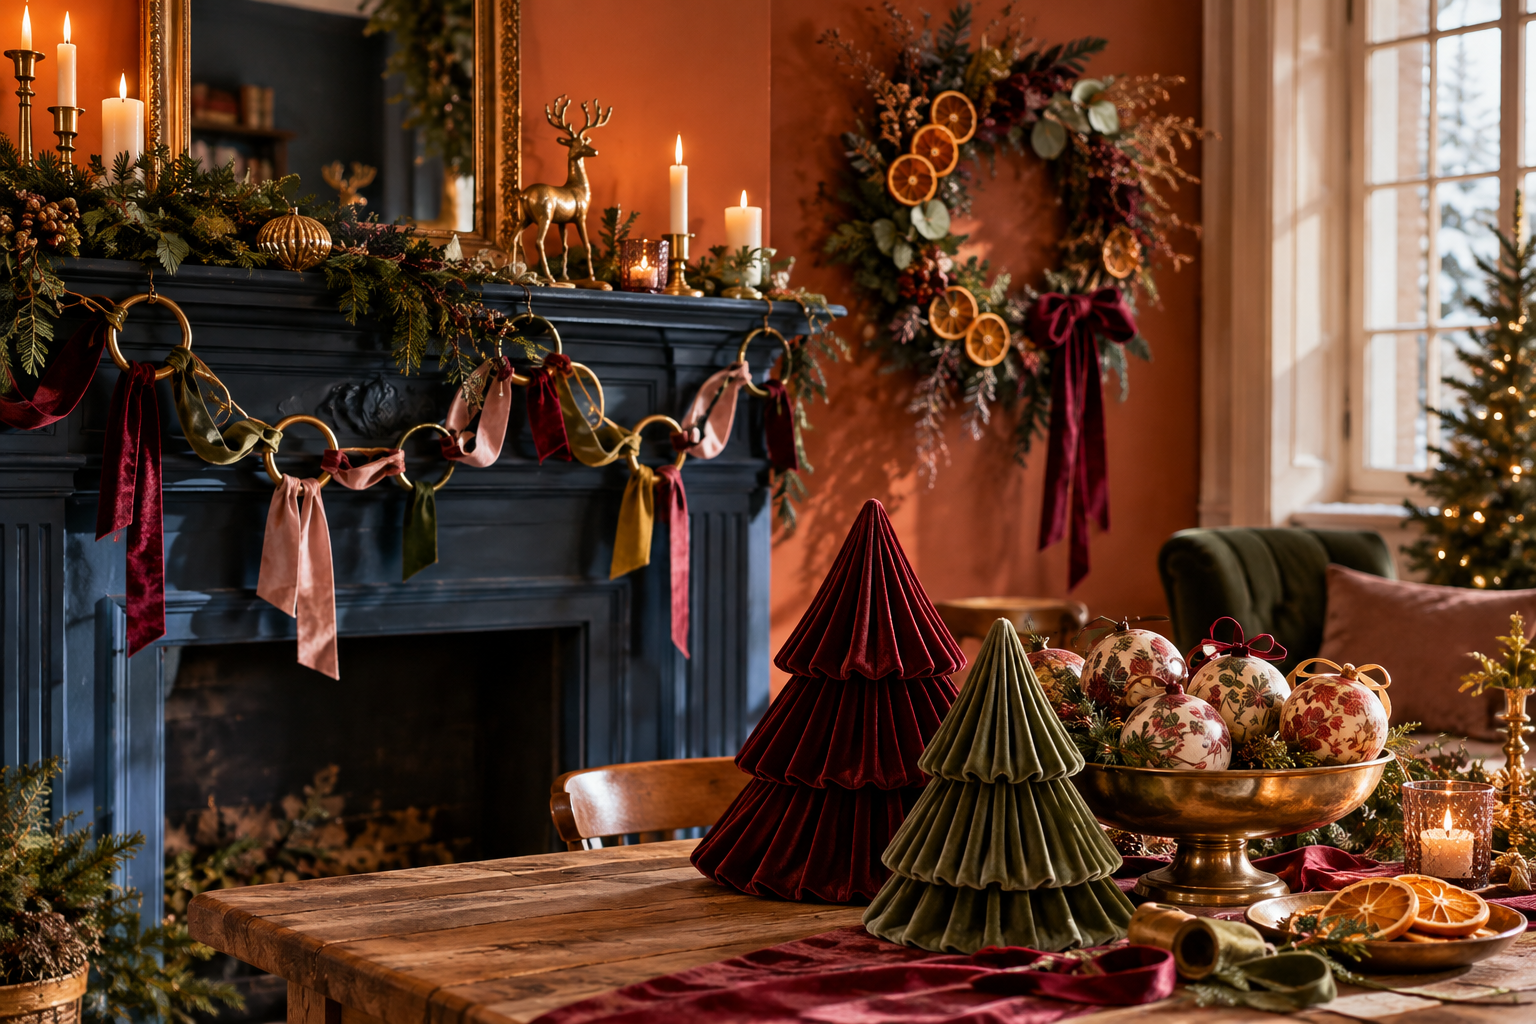
DIY Christmas decor is a lovely way to make your home feel festive without filling it with things you won’t want next year. A few wooden rings and satin ribbon can become a flowing garland. Patterned napkins transform plain ornaments. Dried oranges add warmth to a wreath, and pleated velvet turns simple foam cones into little tabletop trees.
Below are four handmade Christmas decoration ideas with clear steps, material tips and ways to style each finished piece. If you enjoy making ornaments from everyday materials, you might also like our DIY cork Christmas ornaments.
Editorial note: This guide combines demonstrated methods with independent decorating suggestions.
Pick the Christmas craft that suits your space
| Project | Best display spot | Main technique |
|---|---|---|
| Satin ribbon garland | Tree, mantel or railing | Simple knots |
| Decoupage ornaments | Tree or decorative bowl | Patterned paper layering |
| Dried-orange wreath | Entryway or door | Asymmetric arranging |
| Pleated velvet trees | Shelf, console or mantel | Fabric pleating |
Choose a palette before you start shopping. Burgundy, chestnut and olive feel vintage and warm; sage, cream and antique gold are softer. The ideas in our burgundy and brown Christmas decor guide are useful if you want several handmade pieces to work together.
1. Satin ribbon garland with wooden macramé rings
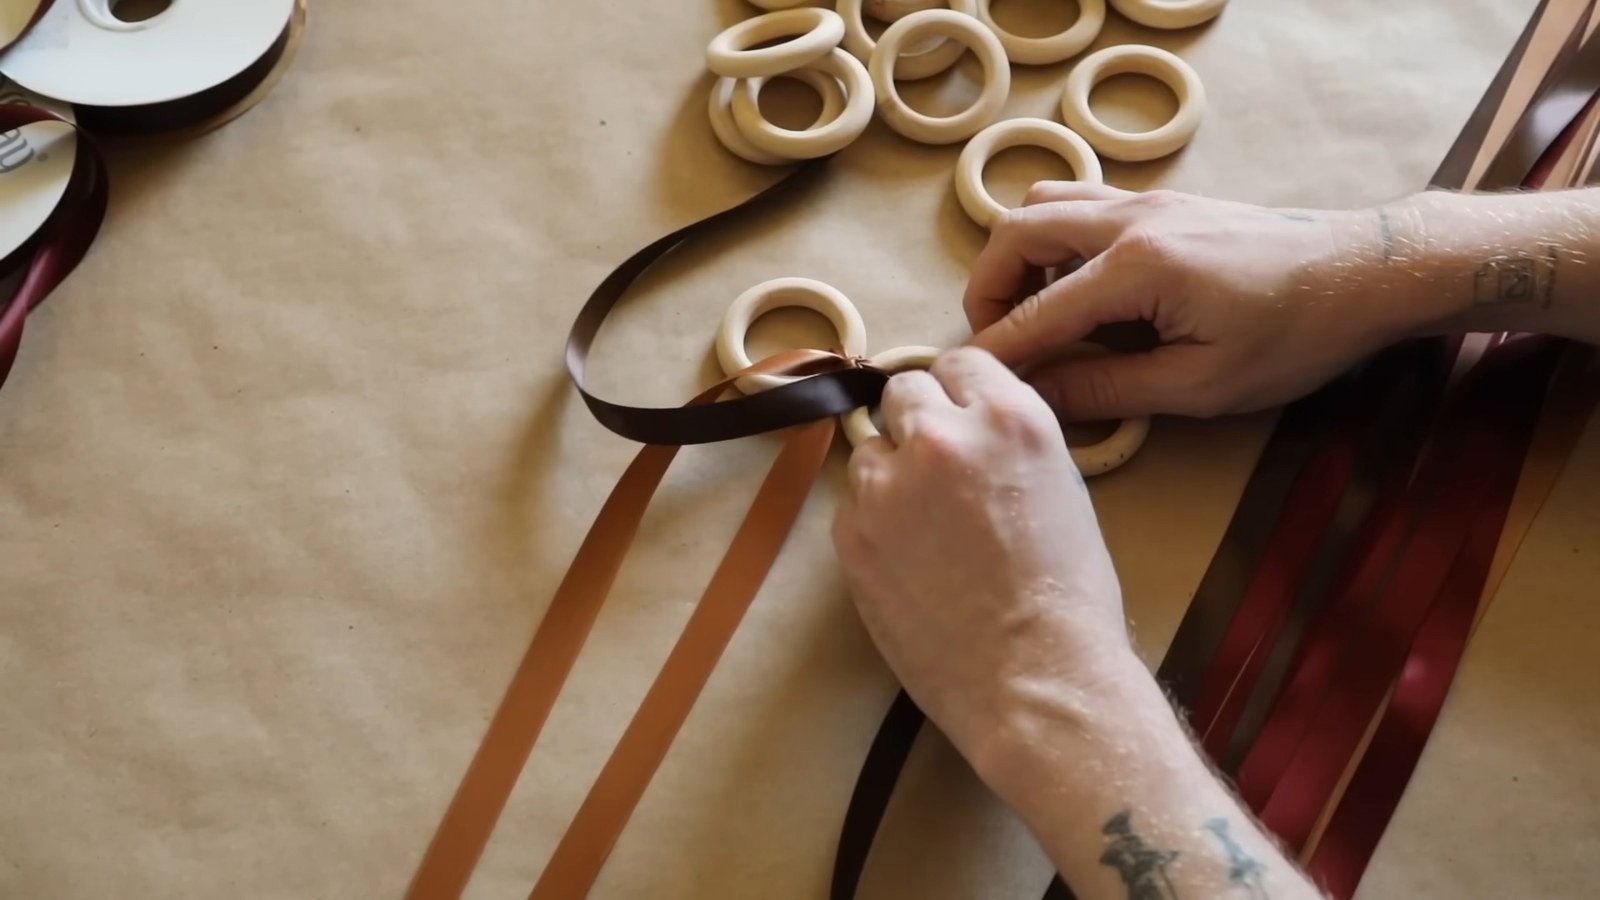
The ring construction keeps the garland light, while long satin tails give it movement. Use two or three closely related ribbon shades rather than one flat color. Burgundy, caramel and tobacco work beautifully with natural wood.

What you’ll need
- Wooden macramé rings of a similar size
- Satin ribbon in two or three colors
- Scissors and measuring tape
- Removable hanging hooks or soft ties
Step by step
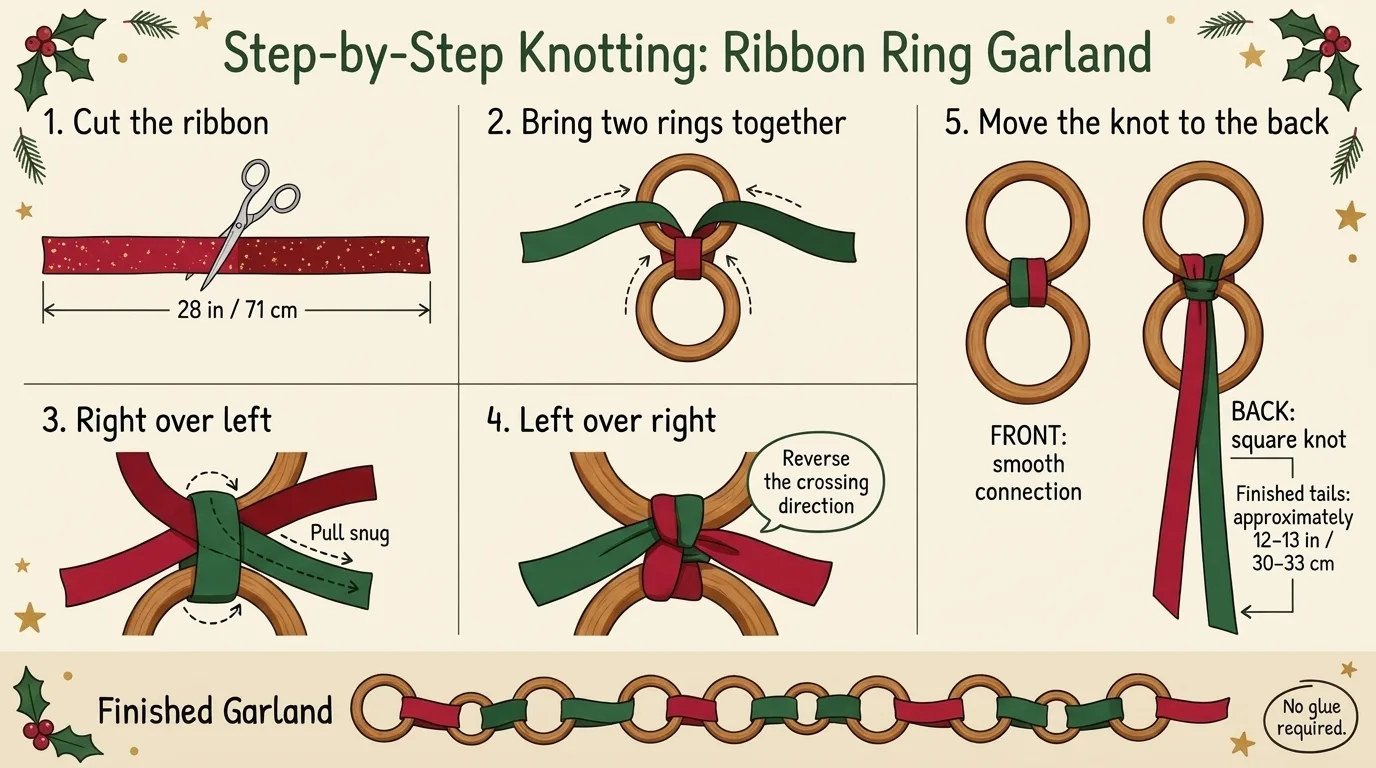
- Lay out the rings in a line to see how long your garland should be. Measure the mantel, tree or other display area first.
- Cut one trial piece of ribbon. The demonstration uses roughly 28 inches (71 cm) per join, but adjust to the size of your rings and desired hanging tails.
- Thread the ribbon between neighboring rings and tie a square knot: right over left, then left over right.
- Move the knot behind the rings, letting both ribbon ends hang below the join. Repeat down the length of the garland.
- Hang the finished piece before trimming. Small differences in the ribbon drape make it feel relaxed.
Try this: Carry one ribbon color into gift wrapping or a tree bow. A recurring color makes the ring garland feel like part of the room, even when the materials are inexpensive. Do not hang ribbon where it could touch a flame or become a hazard on a stair handrail.
2. Vintage-looking decoupage Christmas ornaments
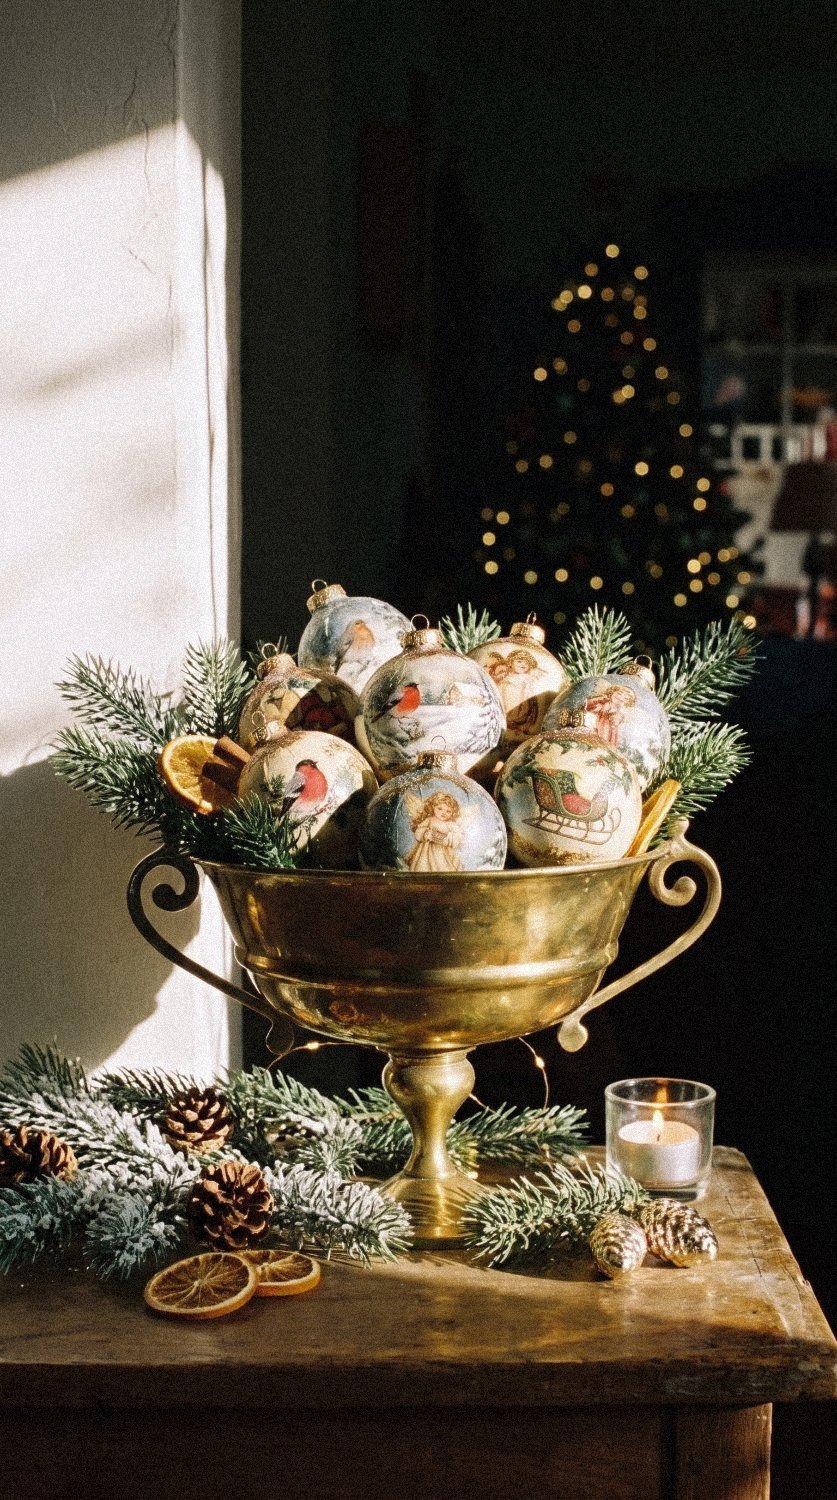
A patterned napkin and a plain bauble can make a surprisingly beautiful pairing. Small botanical prints, paisley and William Morris-inspired motifs feel especially appropriate for an old-fashioned Christmas. The main challenge is keeping thin, wet paper smooth over a curved surface.
What you’ll need
- Plastic Christmas ornament blanks with removable caps
- Three-ply decorative paper napkins
- Mod Podge or another suitable decoupage medium and a soft broad brush
- Scissors, drying stand and optional white plastic-compatible paint
- Optional bronze-colored paint and metallic wax for the caps
Step by step
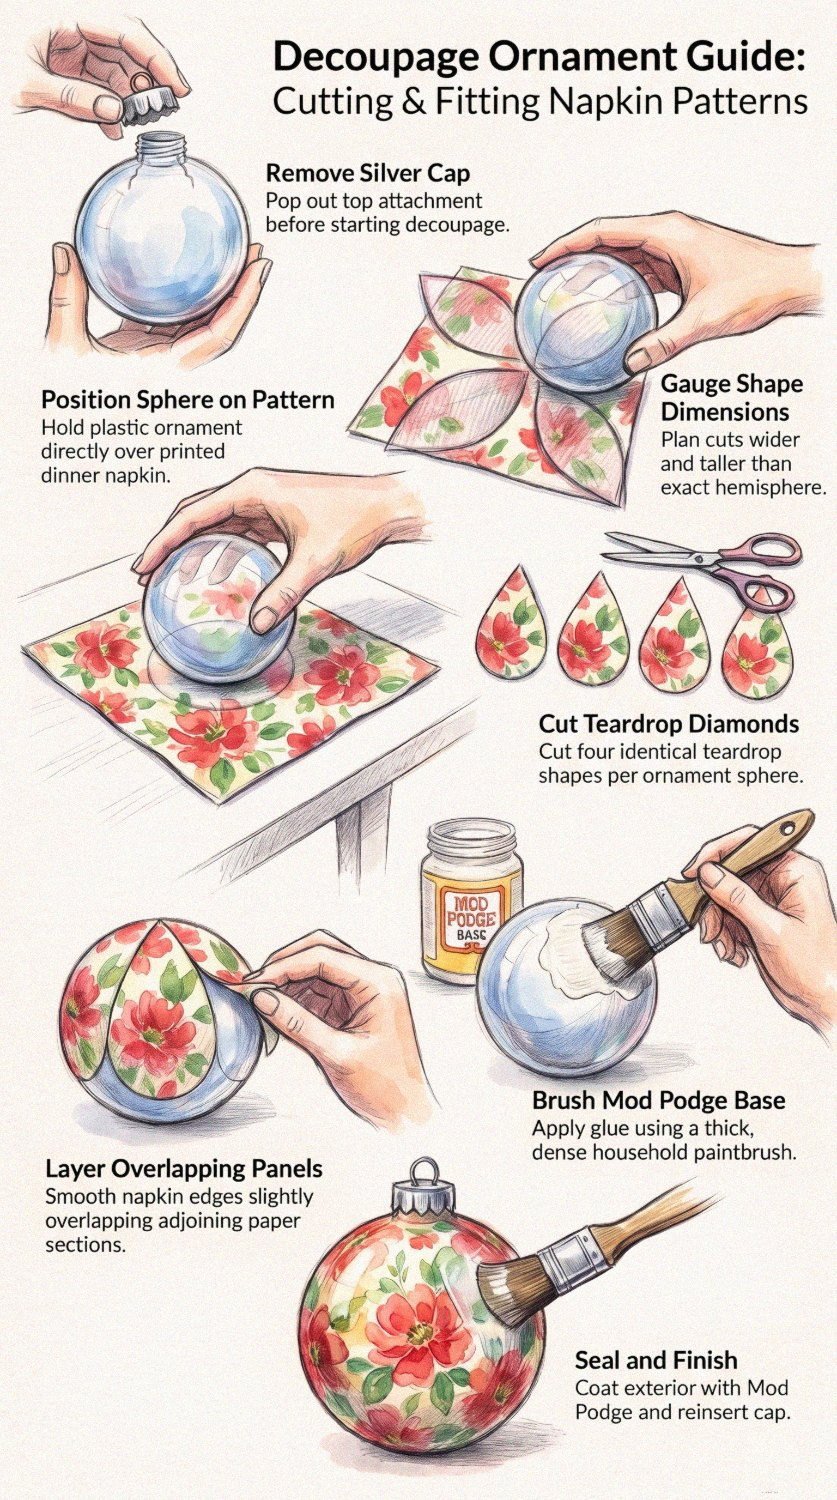
- Remove the ornament cap and separate the napkin layers, keeping the printed top ply.
- Cut the print into four elongated teardrop or petal-shaped pieces. Test their width against the ball; the shapes should overlap just a little.
- If the blank is transparent, add a thin white base coat suitable for plastic and let it dry. This can stop the printed design from looking washed out.
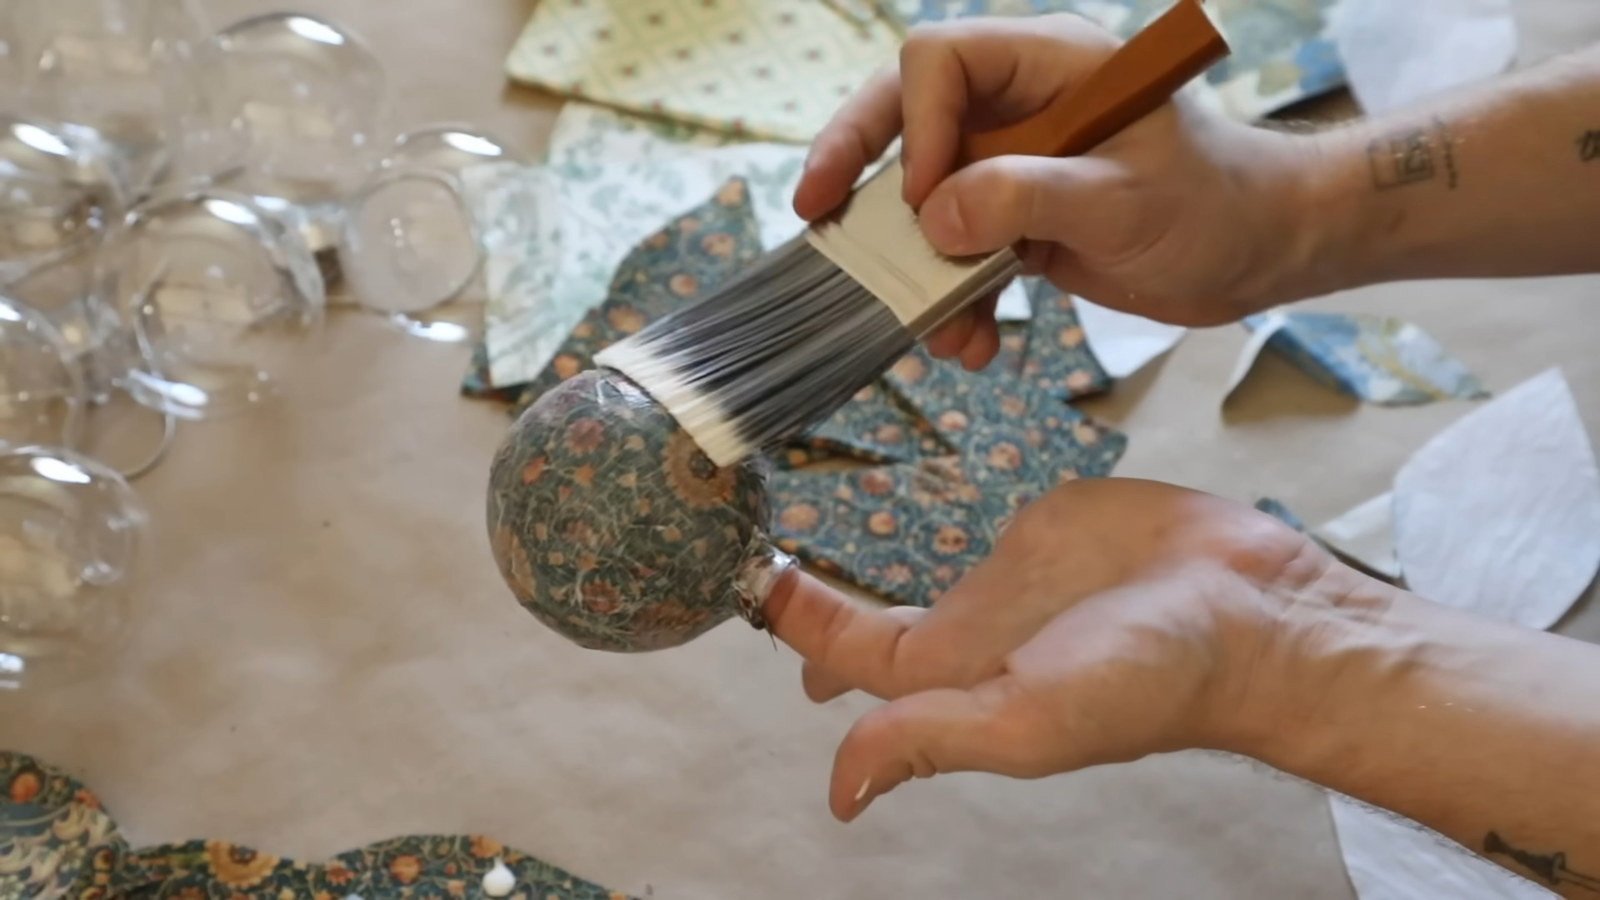
- Brush a thin layer of decoupage medium onto part of the ornament, apply one paper piece and smooth gently from the center toward the edges.
- Add the other pieces in small overlapping sections. Avoid over-brushing fragile wet paper.
- Let the ornament dry according to the product instructions, then add a compatible finishing coat if directed. Replace the cap only after it is fully dry.
A muted bronze cap and a tiny touch of gold wax can finish the vintage effect. When using spray paints or solvents, follow the safety instructions and make sure they’re suitable for the material. For a separate example of decoupage and sealing methods, see Plaid’s own ornament tutorial.
Display idea: Set several patterned ornaments in a shallow brass bowl on a sideboard. Mix two coordinating prints rather than four unrelated ones, and leave enough space to see the details.
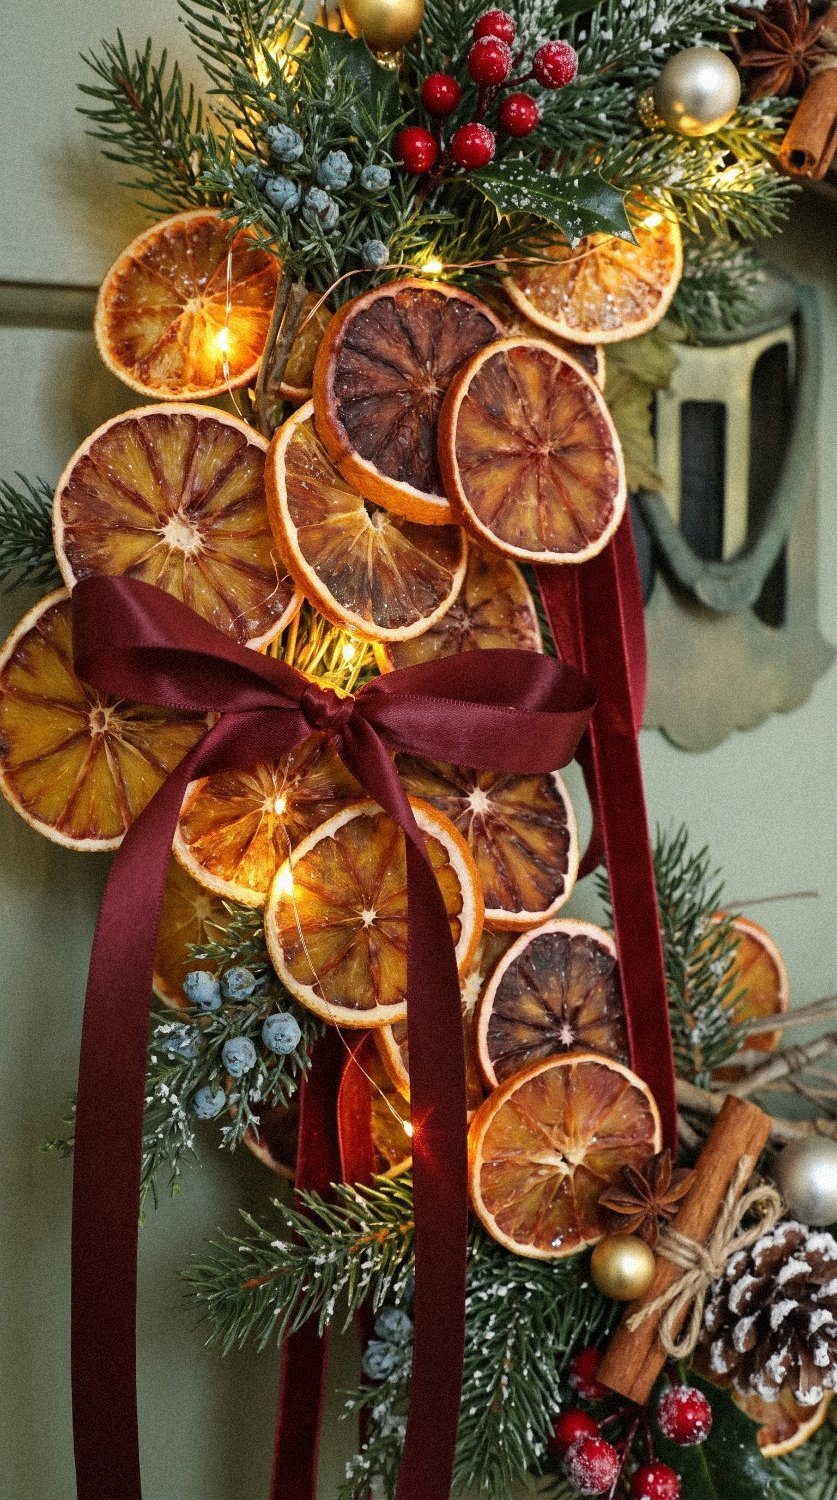
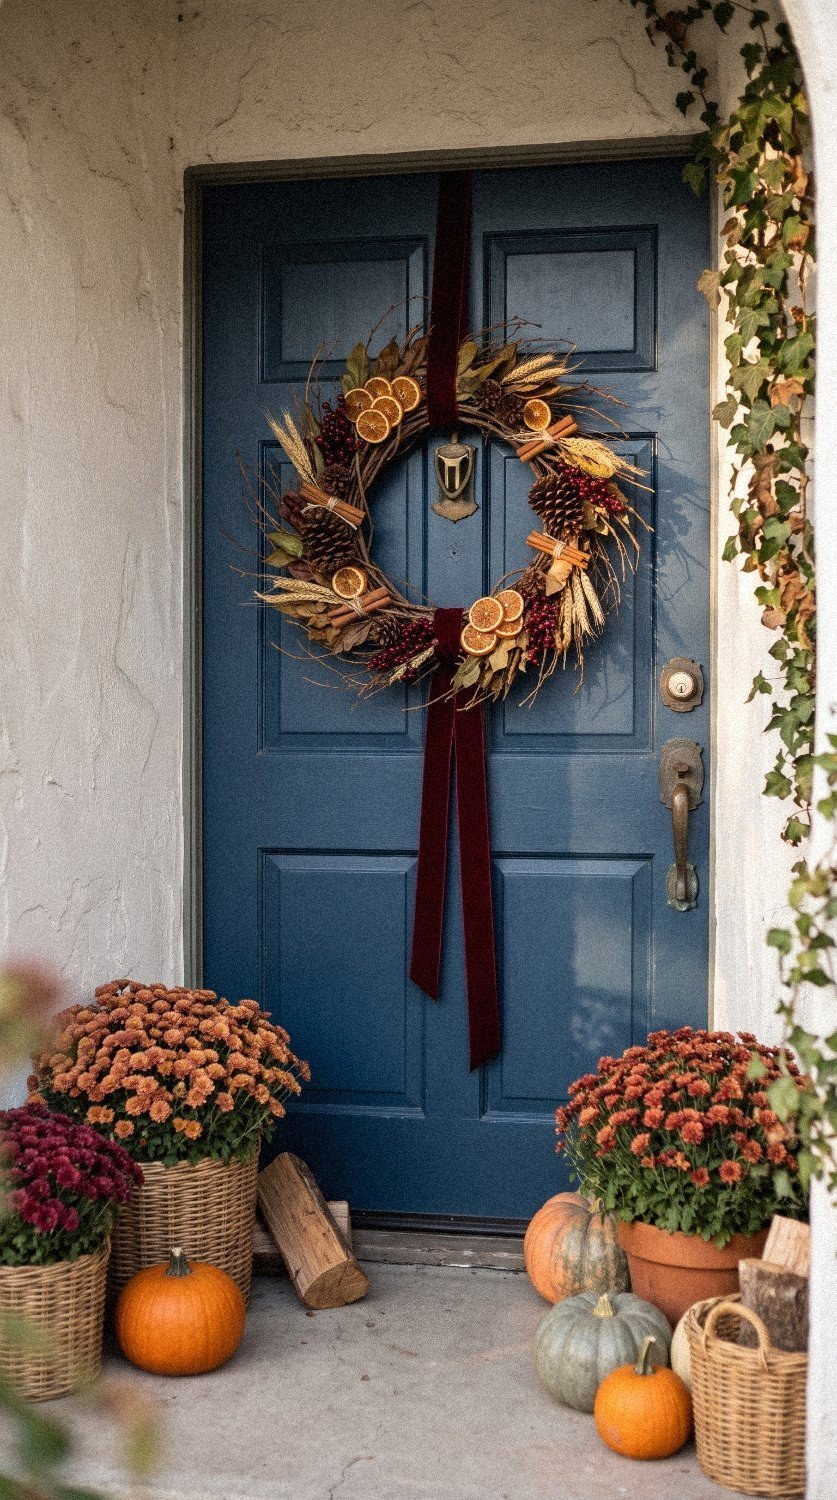
3. Sculptural dried-orange wreath with velvet ribbon
Grapevine, dried citrus and velvet make a naturally rich combination. The easiest way to keep a wreath interesting is to leave a section of the grapevine exposed. Gather the citrus on one side and let a ribbon trail down the front.
What you’ll need
- Grapevine wreath base
- Fully dried blood orange or regular orange slices
- A low-temperature glue gun or adhesive suitable for your materials
- Velvet ribbon, optional satin bow and a hanging loop
Step by step
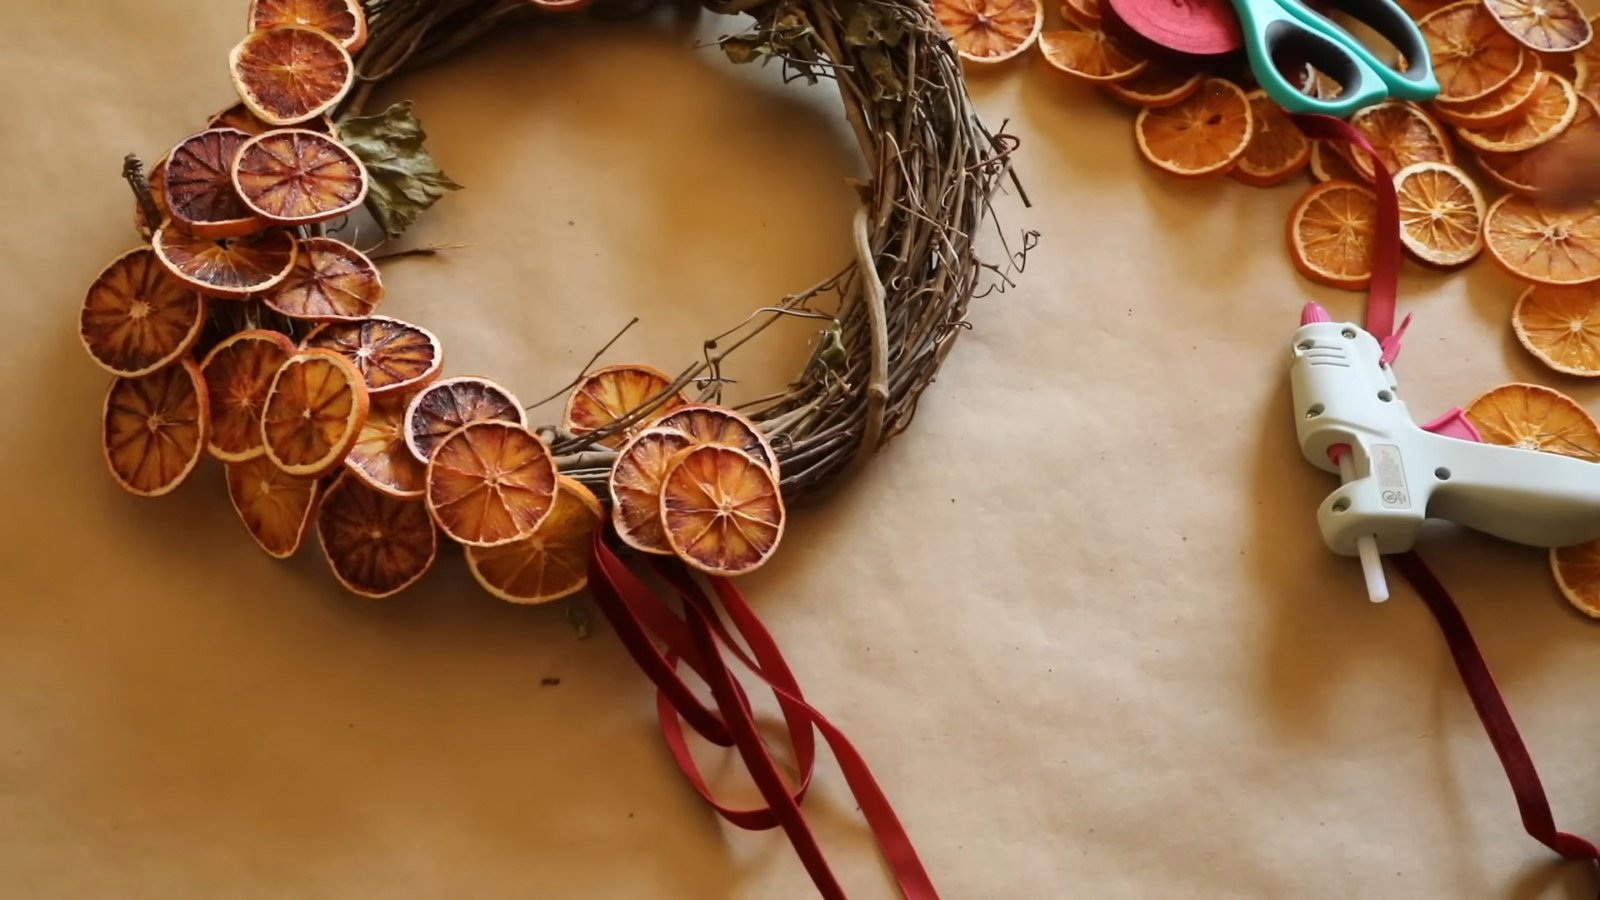
- Place the wreath flat and choose one side for the main citrus cluster.
- Start with larger slices. Attach them firmly to the vine so they have a stable foundation.
- Overlap smaller slices above and between the first ones, tilting a few to make the arrangement look more dimensional.
- Add long velvet ribbon tails beneath the orange cluster and a small satin bow if desired.
- Lift the wreath carefully, check the attachments and hang it in a dry, sheltered place.
Change the mood: Rust ribbon gives the wreath an early-autumn feel, while deep burgundy brings it into Christmas. You can echo those tones in a holiday centerpiece, as in our Christmas table decor ideas.
Dried oranges are sensitive to moisture. Start with thoroughly dehydrated slices and store the finished wreath somewhere dry. Discard pieces that show mold or dampness. A sheltered interior door is more suitable than an exposed outdoor spot.
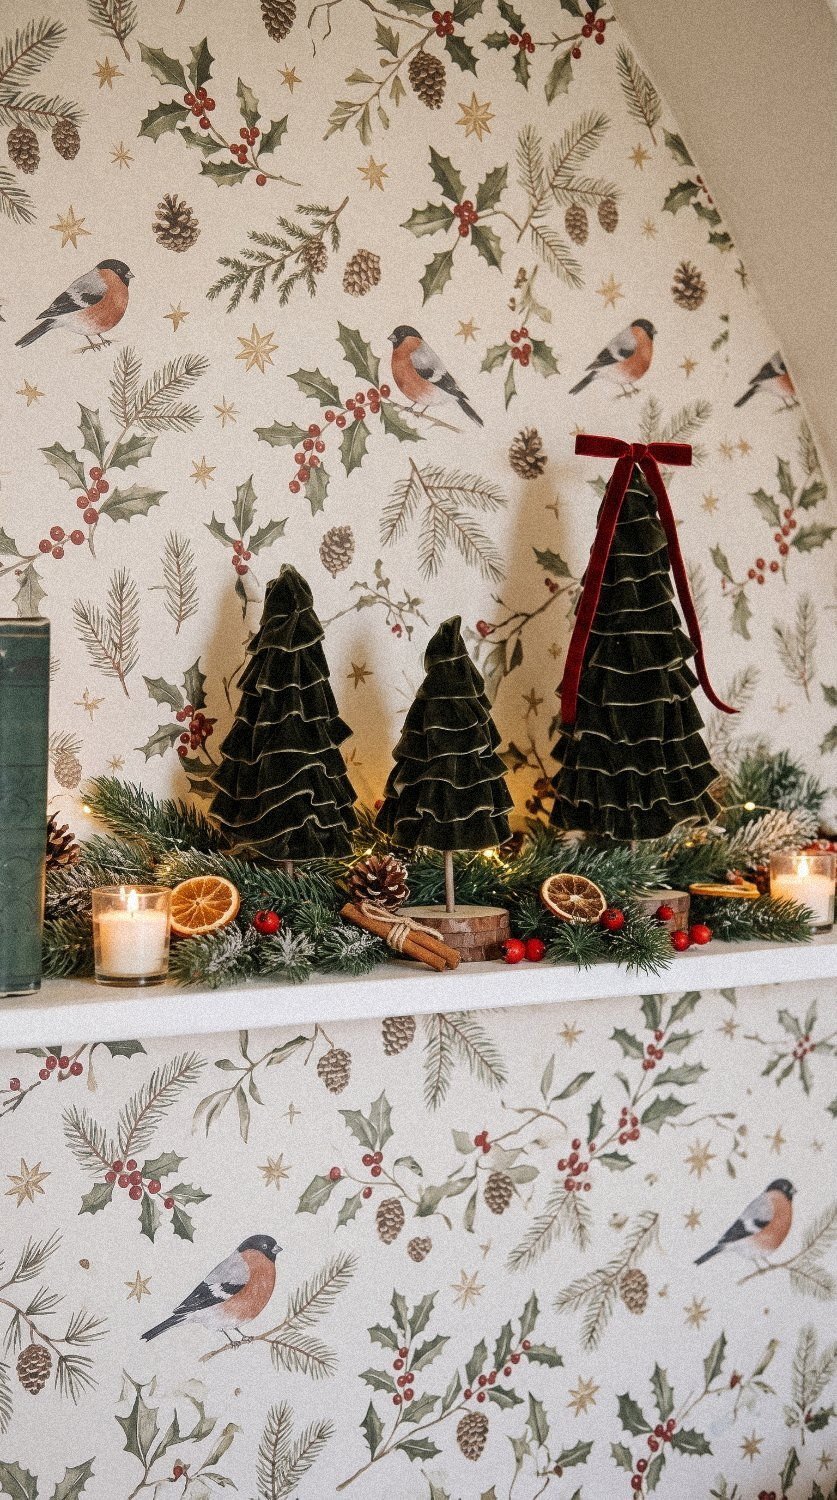
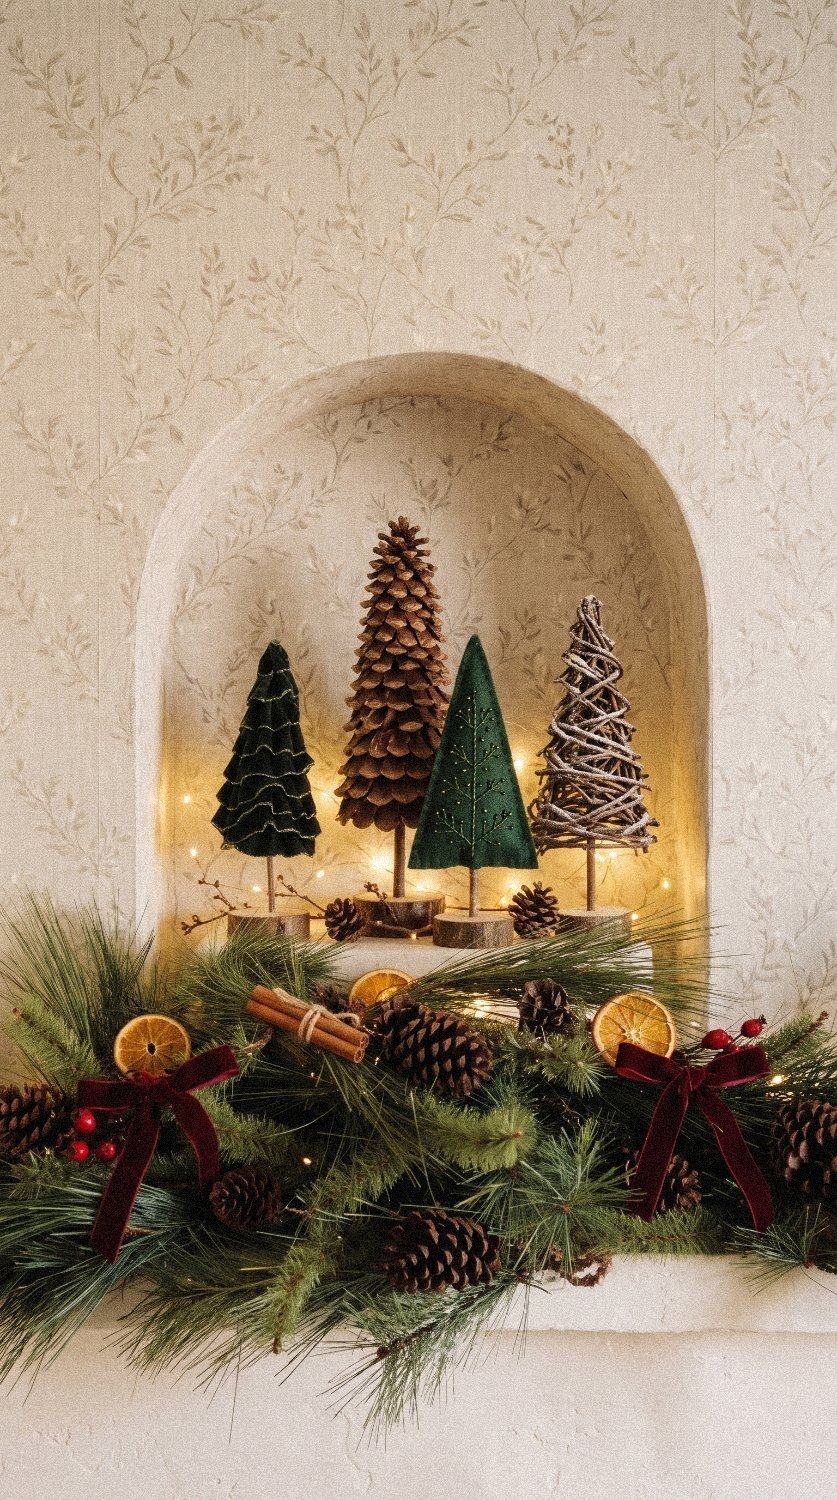
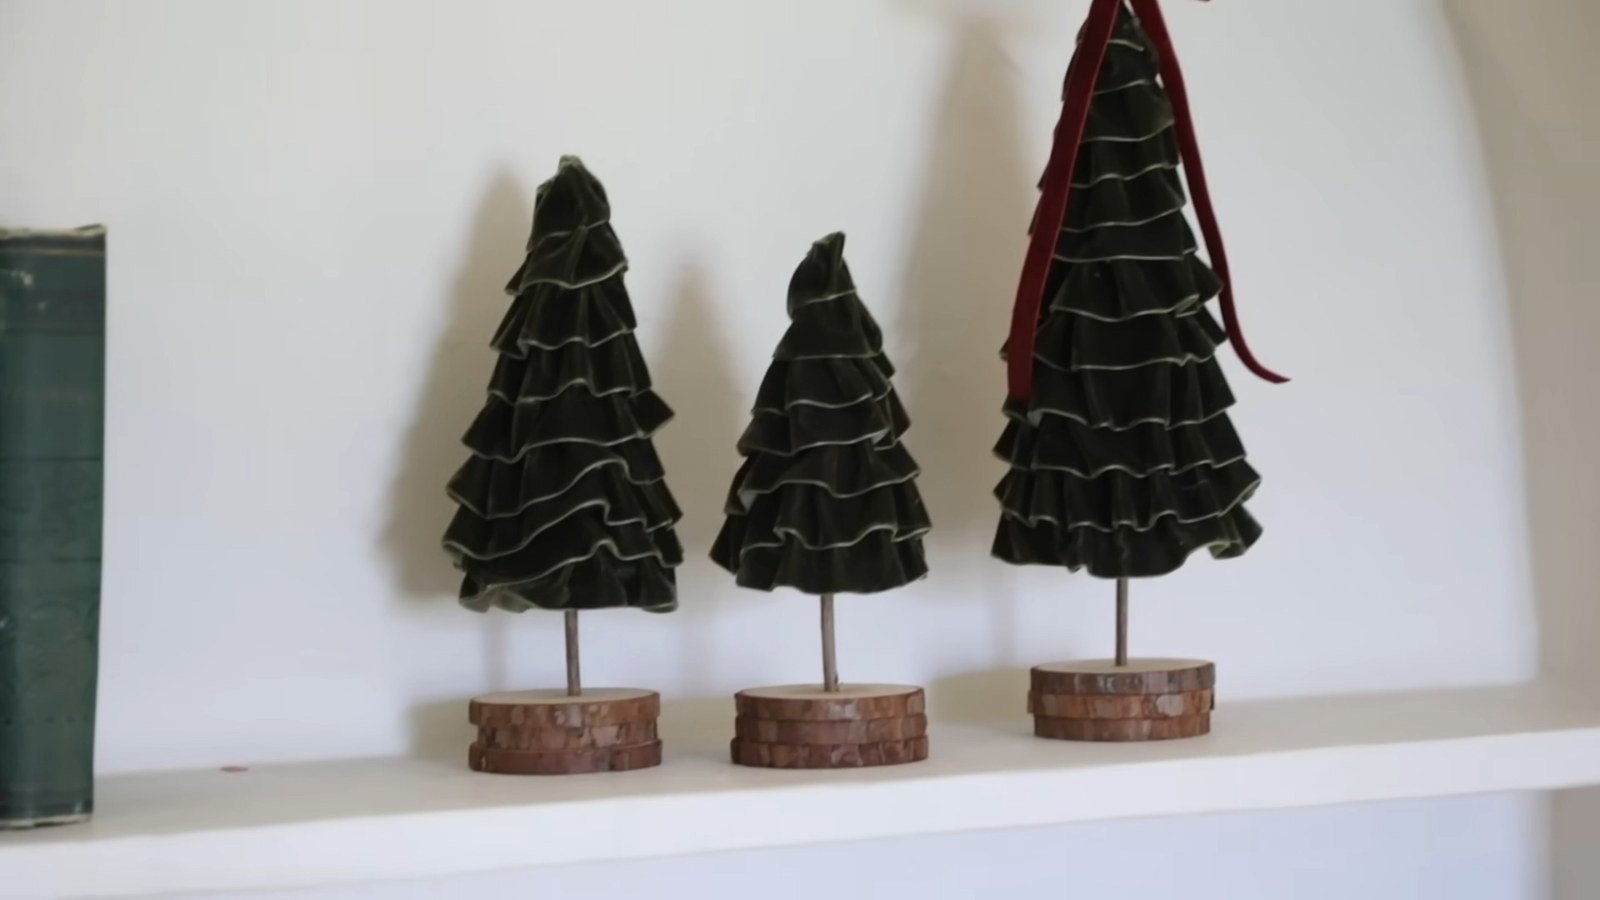
4. Pleated velvet Christmas trees for the mantel
These little trees get their character from folds in the fabric. Forest green, olive and wine-colored velvet catch the light beautifully, especially near wood, antique brass or patterned wallpaper. Use several heights for an easy tabletop arrangement.
What you’ll need
- Foam cones in the sizes you prefer
- Wide velvet ribbon
- Foam-compatible adhesive, or a verified foam-safe low-temperature glue gun
- Wooden slices for a base and an optional dowel trunk
- Scissors; a drill only if making the raised stand
Step by step
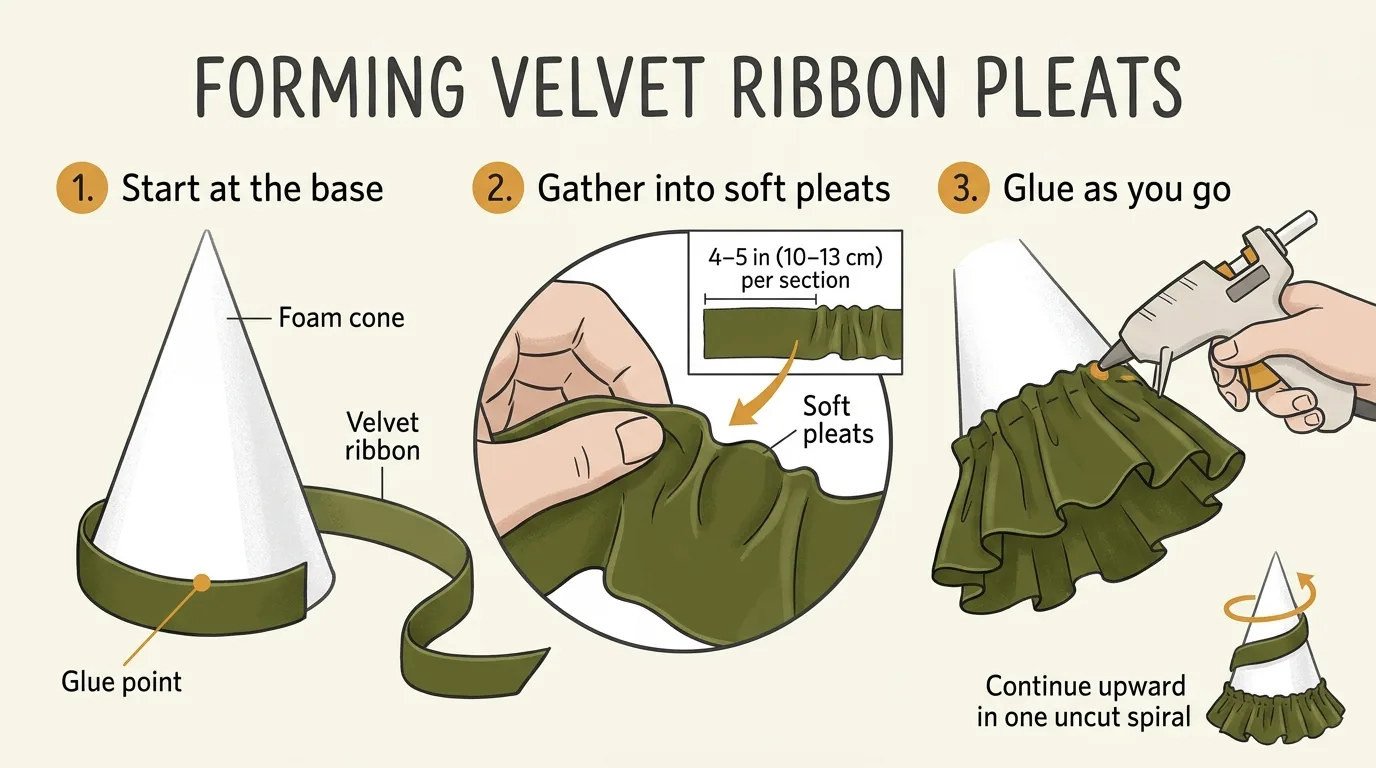
- Begin at the bottom of the cone and secure the ribbon end neatly.
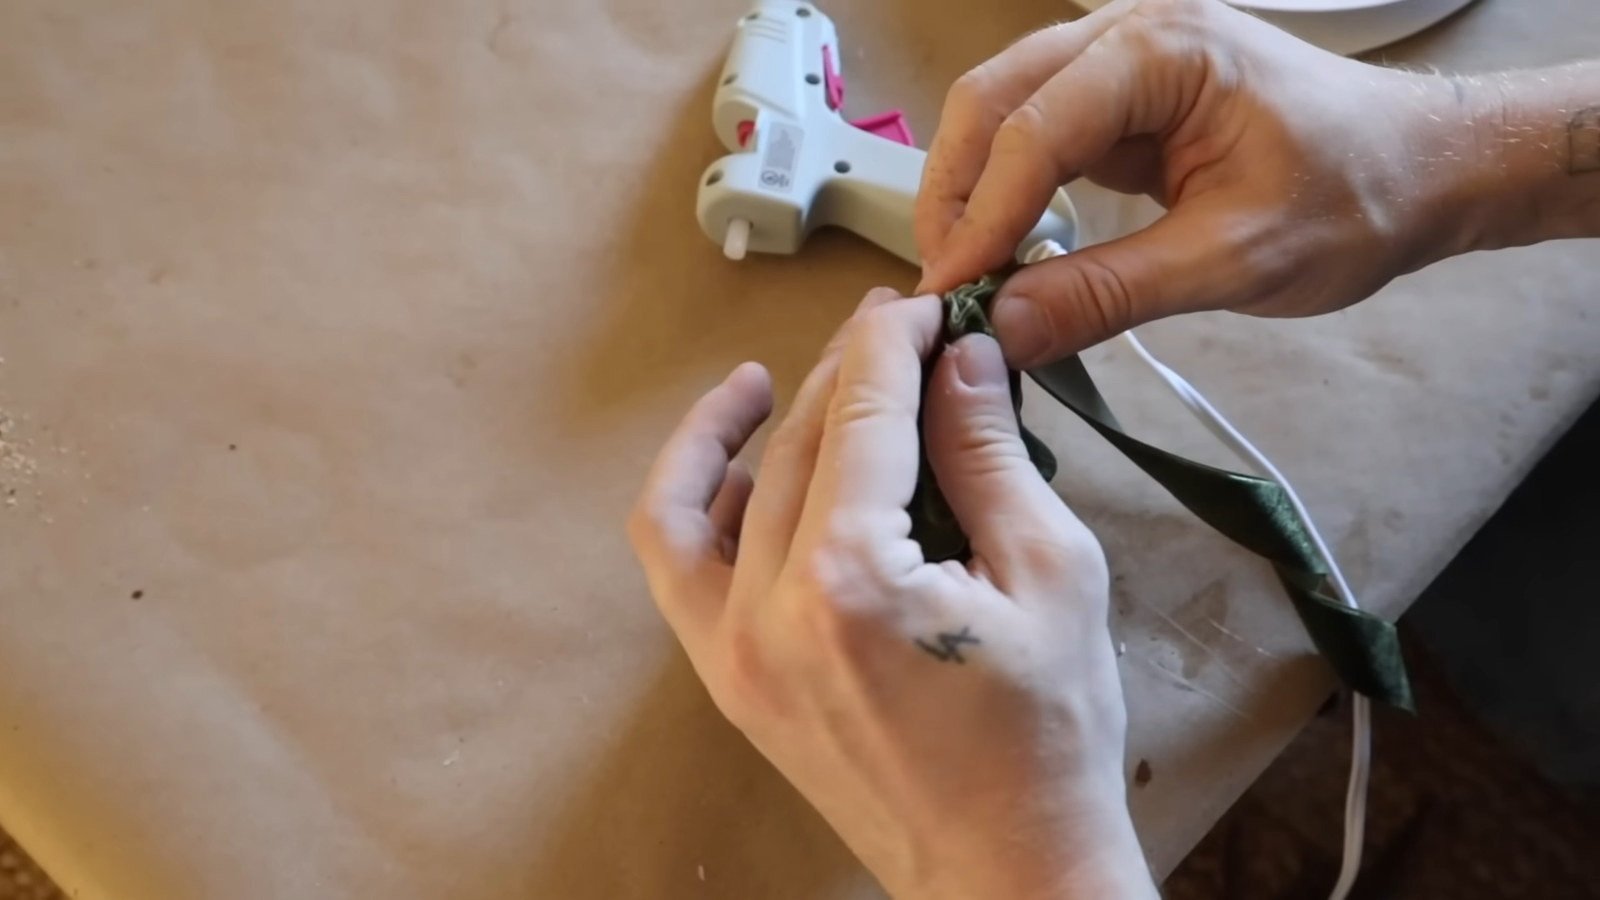
- Wrap a short section around the cone, gathering a little fold before attaching it. Continue with small pleats rather than stretching the fabric flat.
- Spiral upward with the same continuous ribbon, overlapping each row enough to cover the foam and attachment points.
- Make smaller folds as you reach the cone tip. Secure the final end on the back or tuck it carefully into the top.
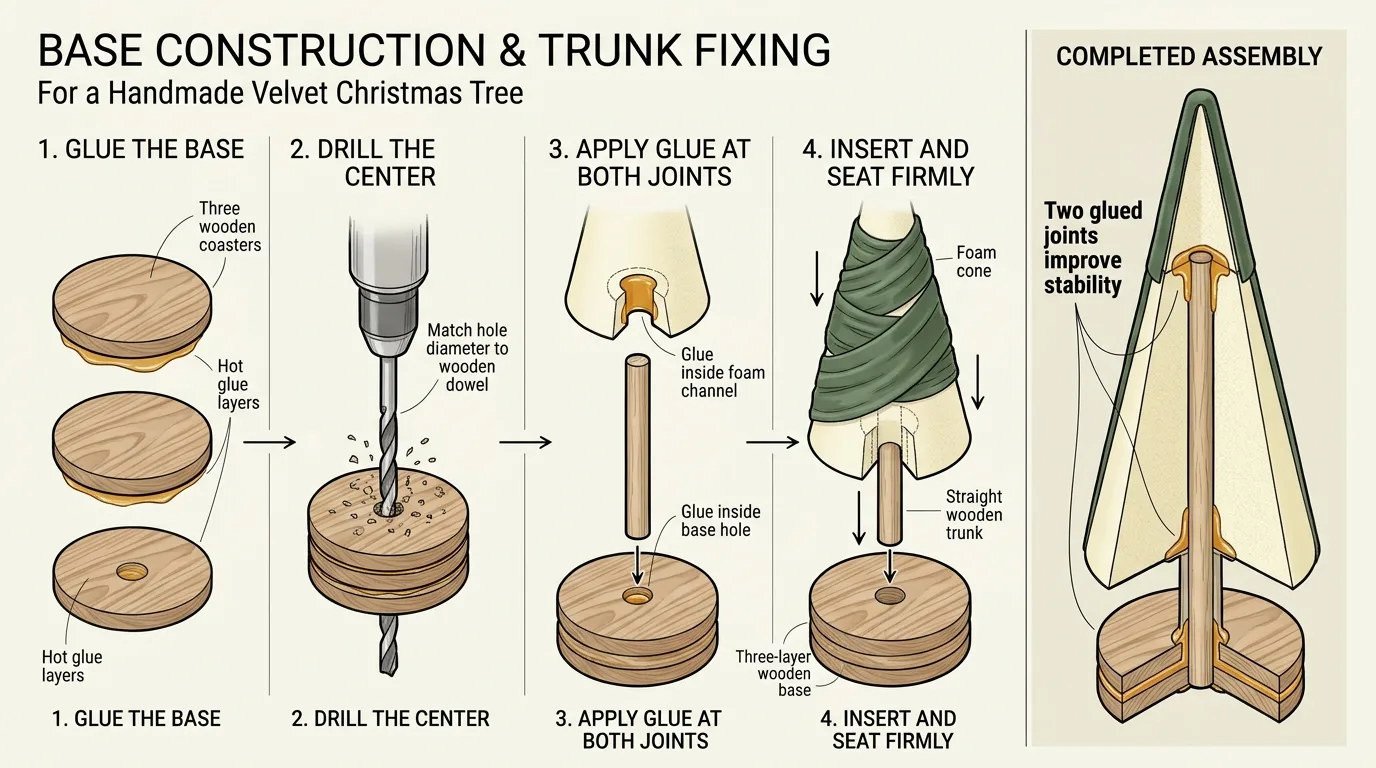
- For a raised tree, make a stable wooden base, secure a straight dowel centrally, then attach the finished cone to it.
How to build a simple wood-slice stand
Stack two or three sturdy wooden rounds for a base, then fit a straight wooden dowel into a centered hole. Keep the stem vertical and check the balance of the assembled tree. The construction diagram below shows how the pieces fit together; adjust the dimensions to your cone.
Watch the glue temperature: Some foam materials can deform when touched by very hot glue. Test an adhesive on a scrap and follow its compatibility instructions. Keep these decorative pieces away from heat sources.
How to use handmade holiday decor throughout the house
Give each piece a little room to stand out. Hang the ring garland where its tails can move freely. Place a cluster of velvet trees on a bookshelf. Display decoupage ornaments in a bowl or on a branch, and use the citrus wreath as the one strong focal point in an entryway.
If you want a consistent look, repeat the same velvet color in the trees and wreath ribbon. Let the ornament pattern pick up one of those shades. Our living room fireplace ideas offer more examples of seasonal styling around a focal point, though all flammable crafts must stay well away from a working fireplace.
Holiday safety: Keep ribbon, dried fruit, paper and foam decorations away from candles, heaters and open flames. The U.S. Fire Administration advises keeping candles at least 12 inches from anything that can burn. Flameless LED candles are a safer option beside handmade displays.
Troubleshooting: little changes that improve the finish
- Garland twists: Position each knot behind the rings, then straighten the chain after hanging.
- Paper wrinkles: Use smaller tapered pieces, a lightly loaded brush and gentle pressure.
- Wreath looks flat: Overlap the citrus and vary the angle of the upper layer without weakening the joins.
- Velvet has gaps: Bring each spiral row slightly over the previous one instead of pulling the ribbon tight.
Frequently asked questions
Which project is best for beginners?
The ribbon garland is a good first choice: it needs no painting or glue. Decoupage requires more patience, and the raised velvet tree involves basic construction.
Can I use ordinary oranges rather than blood oranges?
Yes. Regular dried oranges bring warmer amber tones. Blood oranges can give a richer, redder look, but the wreath construction is the same.
How should I store these Christmas crafts?
Keep everything clean and dry. Wrap the ornaments individually, protect velvet folds from crushing and store the citrus wreath where it cannot absorb moisture.
Watch the original DIY Christmas decor video
For the moving demonstration of ribbon knots, decoupage, layered citrus and pleated velvet, watch the original video below.
Video and image attribution: DIY Christmas Decor YOU ACTUALLY WANT TO MAKE!, by Lone Fox. The five tutorial screenshots in this article are credited to this video and reproduced under the stated Creative Commons Attribution (CC BY) license.
Affiliate Disclosure: As an Amazon Associate, I earn from qualifying purchases. This means I may receive a small commission at no extra cost to you.